
Timeline
Manage reservations for one location and date on a Timeline grid or List view. Add bookings, update status, and block booking times.
Open the screen: Sidebar → Table Reservation Management → Timeline
Current views
The app shows Timeline and List — not a drag-and-drop floor canvas (that layout is planned for a future version).
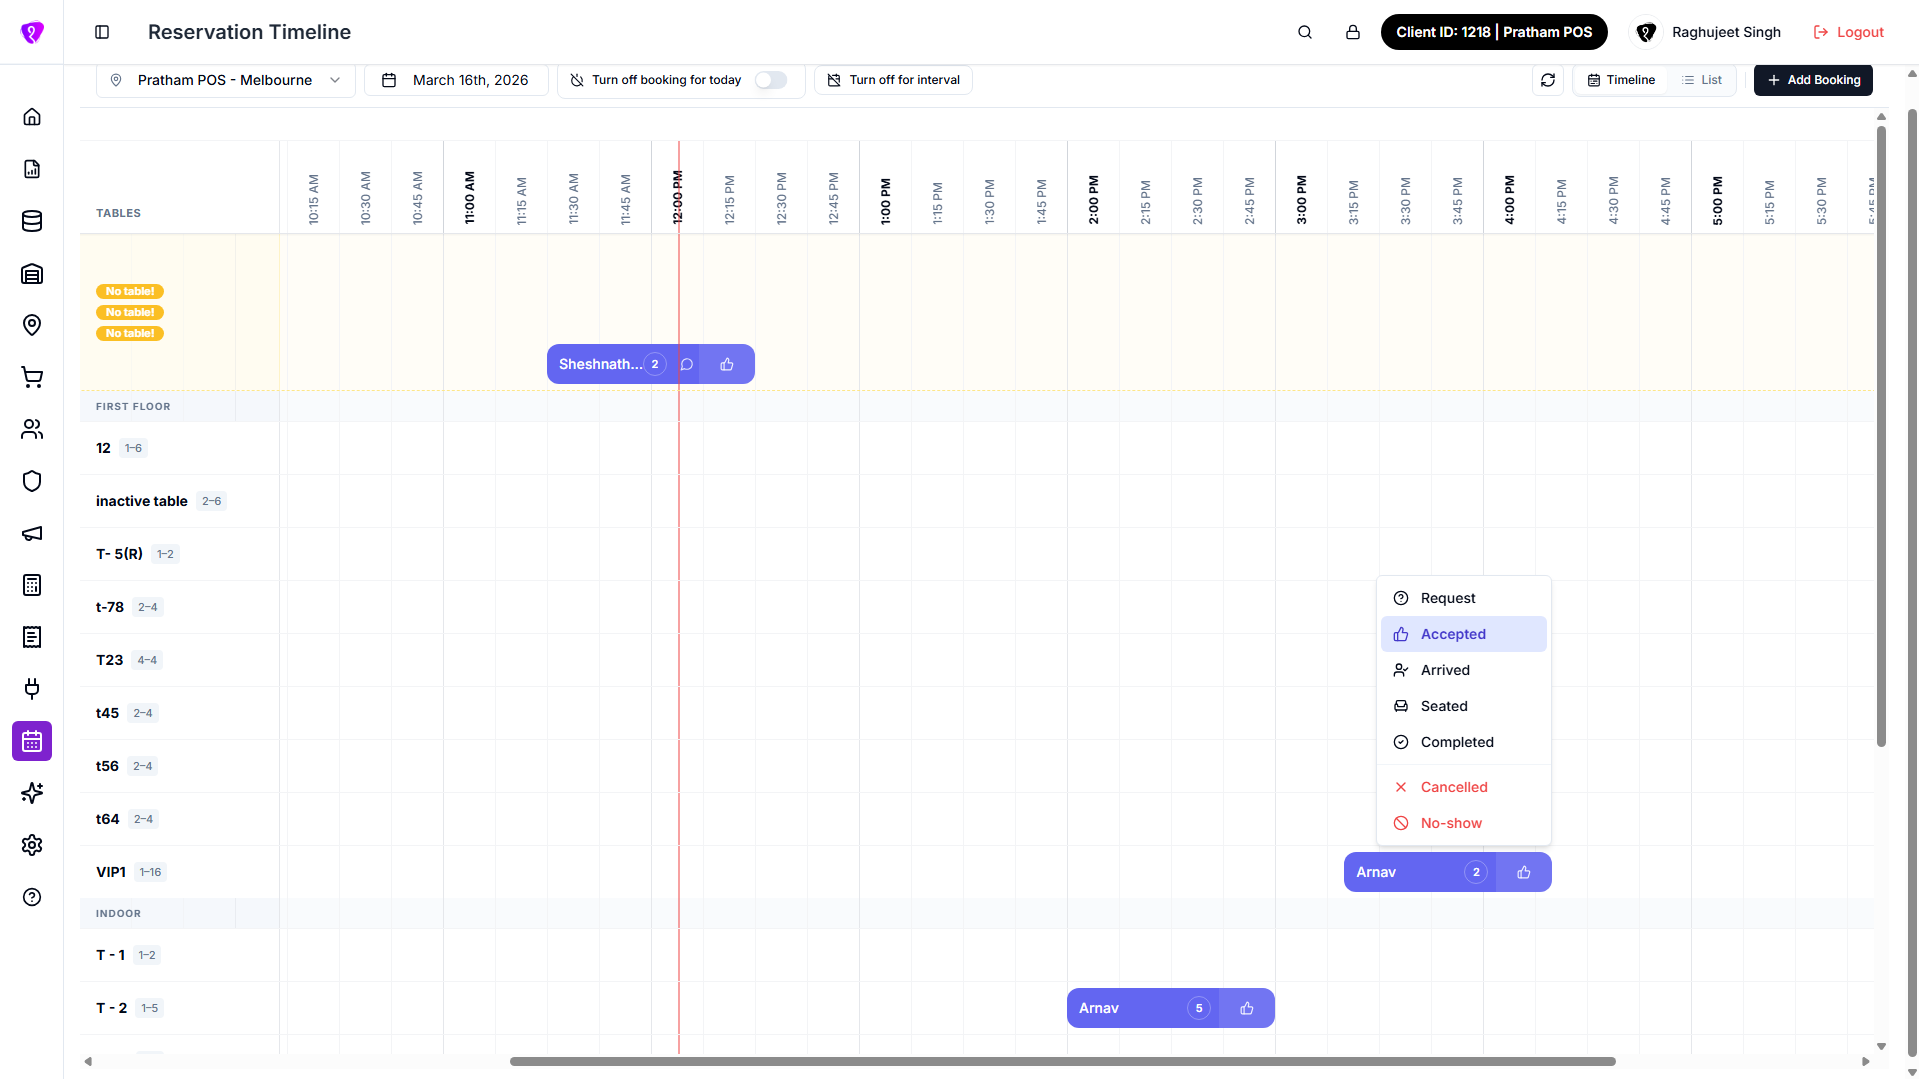
Timeline screen
What it does
Top bar for location, date, booking blocks, and view toggle; main area shows table rows with booking blocks or a filterable list.
Step-by-step
- Open Timeline.
- Pick location (Select location).
- Pick date with the date picker (defaults to the location's today).
- Choose Timeline or List view.
- Tap refresh — Data refreshed successfully / Timeline data updated.
- Optionally use booking controls (below).
Empty state
Select a location to view the reservation timeline.
Add or edit a booking
What it does
Opens Add Booking or edit dialog for an existing reservation.
Step-by-step
- Tap Add Booking (CREATE permission), or tap a booking block / list row (UPDATE).
- Fill guest details, date, time, guests, duration, table or combination, status, and notes.
- For new bookings, optional toggles: Bypass lead time, Bypass max advance, Override capacity, Send notification.
- Tap Add Booking or Save Changes (Booking added / Booking updated on success).
Status options
Request, Accepted, Arrived, Seated, Completed, Cancelled, Declined, No-show.
If status is Declined or Cancelled, fill Decline reason.
Table assignment
Pick an available table or table combination for the slot (loaded from API based on date, time, and guests).
Change status quickly
What it does
Update progress without opening the full dialog (timeline blocks or list status control).
Step-by-step
- Use the status action on a booking (timeline or list).
- Pick the next status.
- On success: Status updated / Reservation marked as {status}.
Typical flow
Request → Accepted → Arrived → Seated → Completed
Terminal: Cancelled, Declined, No-show
Turn off bookings
What it does
Block new bookings for the selected day or specific intervals (UPDATE required).
Whole day
- Toggle Turn off booking for today (or Bookings turned off for today when active).
- Confirm Turn off bookings for {date}? — optional reason (e.g. Staff holiday).
- Tap Turn Off Bookings — Bookings turned off.
- To re-enable, toggle off and confirm Turn on bookings for {date}?
Interval
- Tap Turn off for interval.
- Add interval rows — date, Start Time, End Time.
- Tap Turn Off Bookings — Interval blocked.
- Remove active blocks from Active Blocks list with trash icon — Interval unblocked.
Existing bookings are not removed when turning off a day.
List view
What it does
Same-day reservations as a list with status filter chips (All, Request, Accepted, Arrived, Seated, Completed, Cancelled, No Show) and pagination (10 per page).
Tap a row to edit. Use status dropdown on a row for quick updates.
Permissions
| What you need | Why |
|---|---|
| Reservation Timelines — READ | Open Timeline, refresh |
| CREATE | Add Booking |
| UPDATE | Edit bookings, status changes, turn off bookings |