
Printers & Cash Drawer
This section covers every device you connect for printing and cash handling: the receipt (bill) printer, kitchen order ticket (KOT) printers, bump printers, and the cash drawer. Set these up once - the POS handles the rest automatically from that point on.
🔒 Manager only - printer setup requires access to Settings → Printers.
What printers does the POS support?
| Printer type | What it prints | Required? |
|---|---|---|
| Bill Printer (Main) | Customer receipts after payment | Yes - needed to print receipts |
| Kitchen Printer (KOT) | Kitchen order tickets when an order is placed or updated | If you have a kitchen |
| Bump Printer | Compact bump slips for orders bumped off the kitchen display | If you use a Kitchen Display (KDS) |
| Label Printer | Small stickers for individual packaged items | Optional |
| Customer Info Printer | A separate slip with customer contact details | Optional - useful for delivery |
INFO
You can have more than one kitchen printer. For example, one at the grill station and one at the bar. Each printer is assigned specific item tags so the right ticket goes to the right station automatically.
How to get to Printer Settings
- Tap Settings in the left navigation menu.
- Tap Printers.
The Printers screen opens with tabs across the top:
| Tab | What it manages |
|---|---|
| Bill Printer | Your main receipt printer |
| KOT Printers | Kitchen order ticket printers |
| Bump Printer | Printers that receive bump slips from the kitchen display |
| Label Printer | Item label stickers |
| Customer Info | Customer detail slips |
| Receipt Settings | Receipt layout (covered in Receipt Customisation) |
| Manage Printers | Add, edit, and remove all physical printers |
Manage Printers - how it works per platform
How you register and view printers in the Manage Printers tab depends on which platform you are using. Once a printer is registered, assign it to its role - Bill, KOT, Bump, etc. - in the corresponding tab.
| Platform | What you can do in Manage Printers |
|---|---|
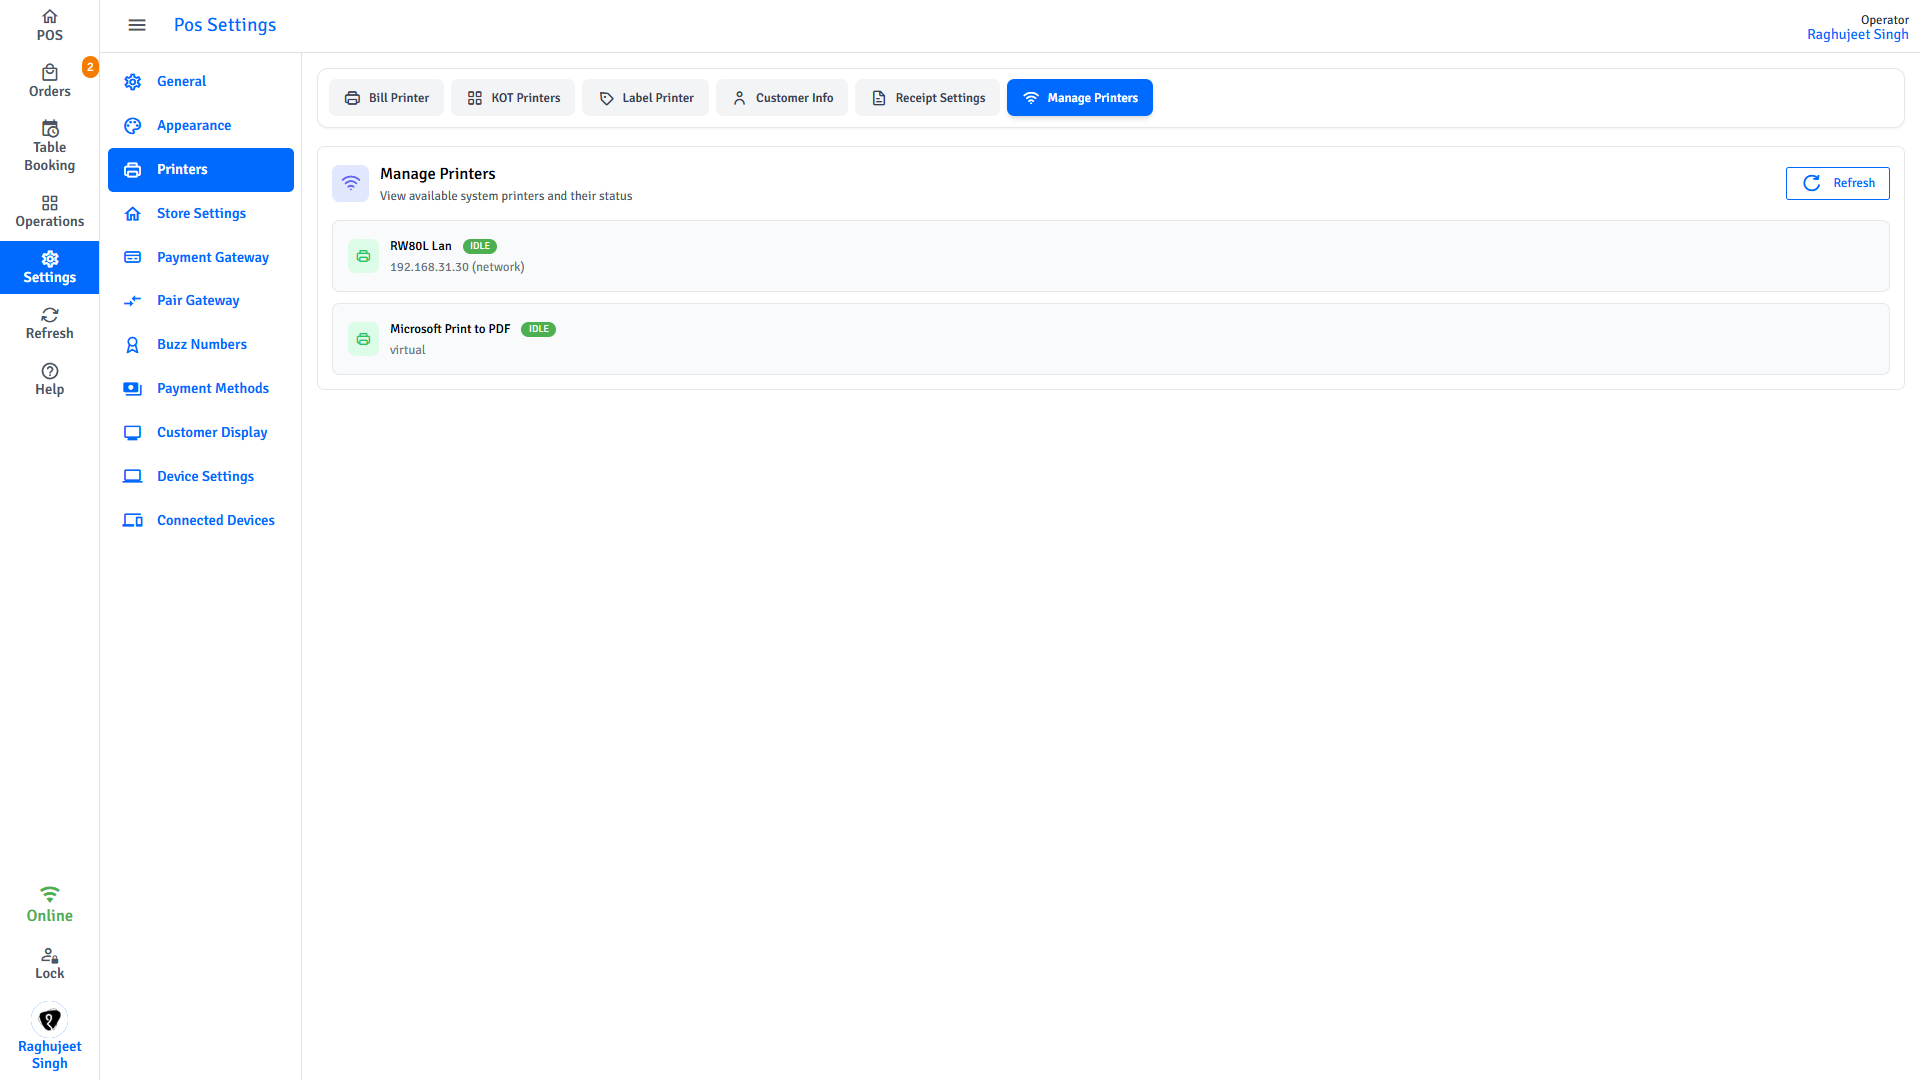
| Windows | View the list of registered printers and their status only - you cannot add printers here. Printers must be registered through Settings (outside the POS app). |
| Android | USB and Bluetooth printers appear automatically once connected. Add network printers manually using an IP address. |
| iOS | Bluetooth printers appear automatically once connected. Add network printers manually using an IP address. |
Windows - printers are registered in Settings, not in the POS
On Windows, open Settings on your device to add or remove printers. The Manage Printers tab in the POS shows you which printers are registered and their current status, but it does not have an Add button. Once a printer is registered in Windows Settings, it appears in the POS list automatically.
Android & iOS - USB and Bluetooth are automatic
Connect a USB printer (Android only) or pair a Bluetooth printer on your device and it will appear in the Manage Printers list automatically - no manual entry needed. You only need to use the Add Printer form for network (IP) printers.
Adding a network printer (Android & iOS)
Network printers must be added manually on Android and iOS.
TIP
Network (IP) printers are the most reliable option for a permanent restaurant setup. The printer must be on the same Wi-Fi network as the POS device. If the printer gets a different IP address after a router restart, printing will stop - assign the printer a static (fixed) IP in your router settings to prevent this.
Steps to add a network printer
- Tap Settings → Printers.
- Tap the Manage Printers tab.
- Tap Add Printer.
- Fill in the fields below.
- Tap Save.
- Tap Test Print to confirm the printer is working.
| Field | What to enter |
|---|---|
| Printer Name | A label you choose to identify this printer later (e.g., "Front Counter", "Kitchen Grill") |
| IP Address | The printer's IP address on your local network (check your router or the printer's config page) |
| Port | Leave as 9100 - correct for almost all thermal network printers |
| Paper Width | 58mm or 80mm - must match the paper roll installed in the printer |
| Printer Type | Select the role: Main (receipts), Kitchen, Bump, Label, or Customer Info |
What paper width should I use?
Open the printer cover and look at the paper roll. Most restaurant printers use 80mm. Smaller portable or counter printers often use 58mm. Selecting the wrong width causes text to be cut off or leaves excessive blank space on the right.
Bill Printer (receipt printer)
The bill printer produces the customer's receipt after payment. There can be only one bill printer per terminal.
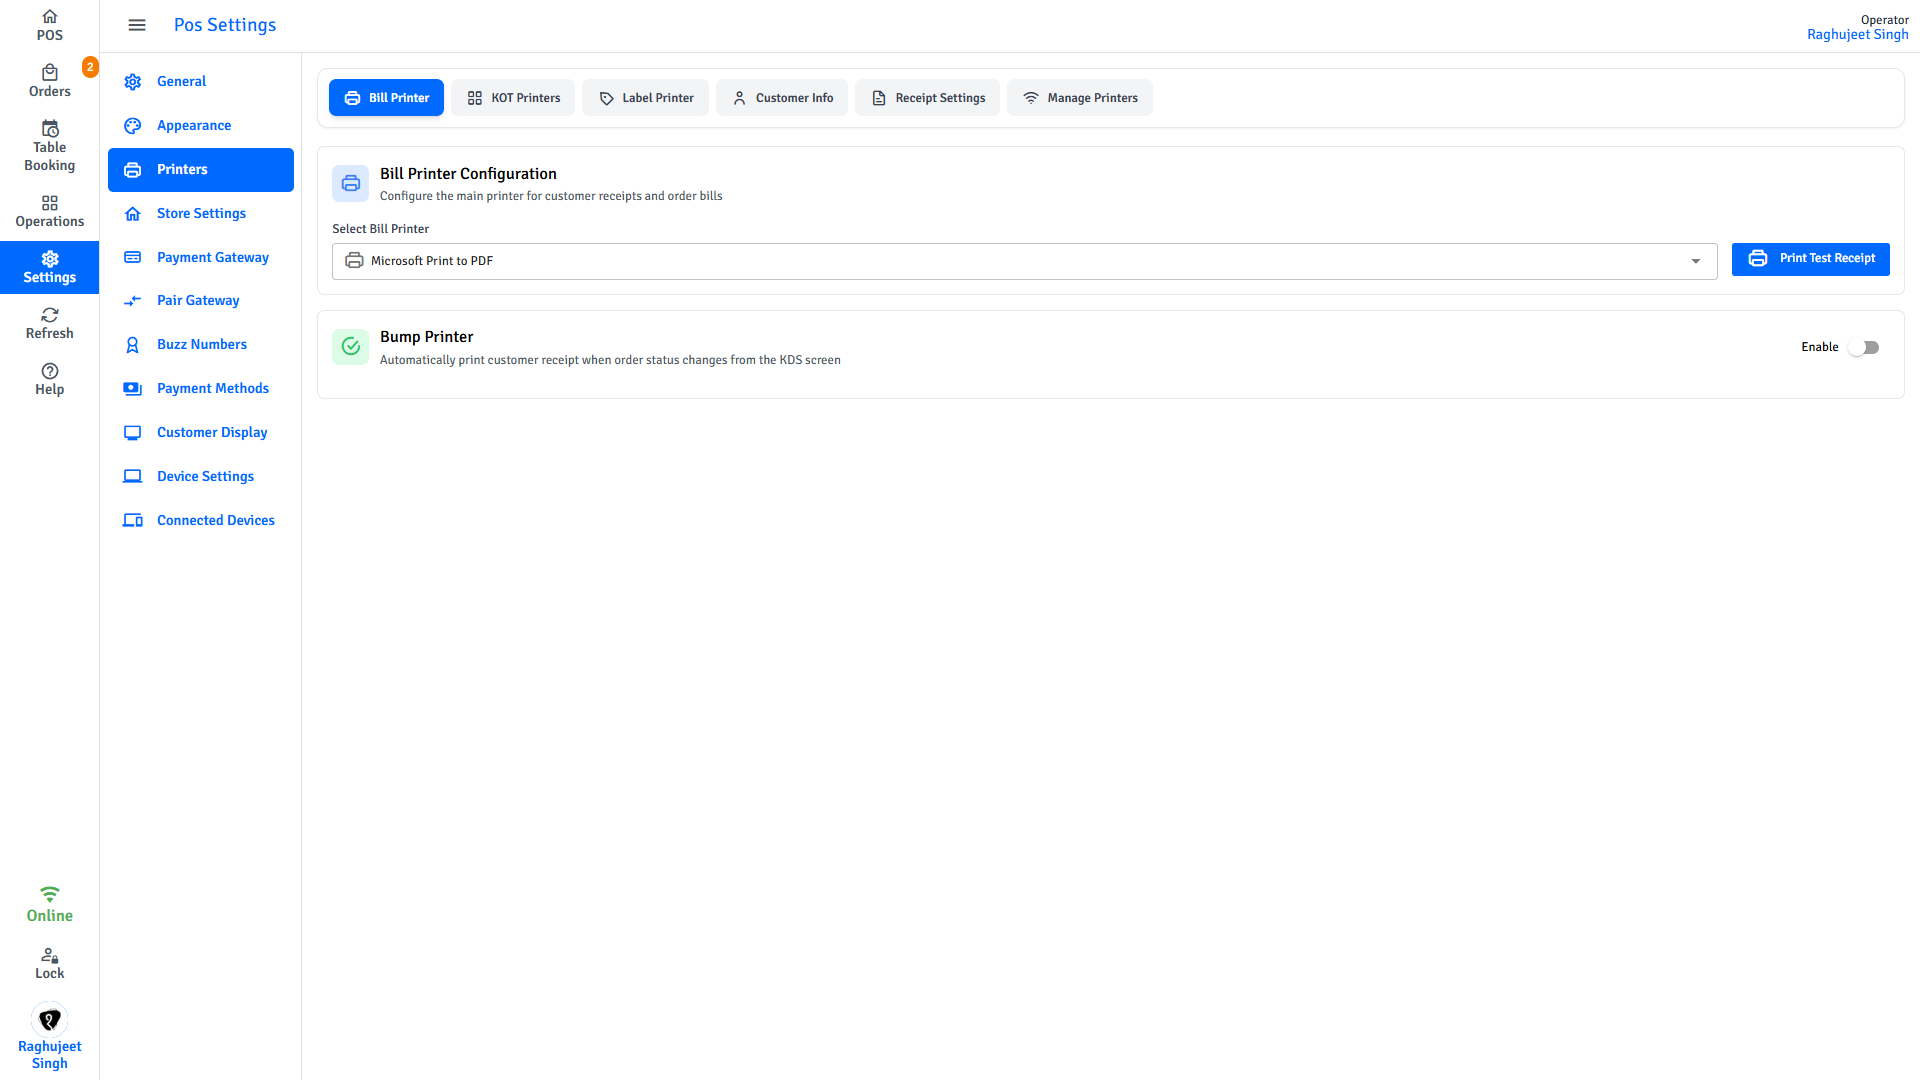
Assigning the bill printer
After adding your receipt printer in Manage Printers:
- Tap the Bill Printer tab.
- Select your printer from the Select Bill Printer dropdown.
- Tap Print Test Receipt to confirm it prints correctly.
TIP
To customise what appears on the receipt (logo, footer text, GST details), go to the Receipt Settings tab or see Receipt Customisation.
Kitchen Printers (KOT)
A kitchen printer prints a ticket every time an order is placed or updated. Use KOT printers to send order details to the kitchen without staff having to relay orders verbally.
How tag routing works
Tags are labels you assign to menu items in the Admin Portal (e.g., "grill", "salads", "bar"). Each KOT printer is assigned one or more tags. When an order is placed, each item is automatically sent to the printer whose tags match that item.
Example:
| KOT printer name | Assigned tags |
|---|---|
| Hot Kitchen | grill, hot-food, mains |
| Cold Kitchen | salads, cold-drinks |
| Bar | cocktails, alcohol |
A burger tagged "grill" prints at Hot Kitchen. A salad tagged "salads" prints at Cold Kitchen.
WARNING
Items with no matching tag will not print any kitchen ticket. Make sure every item in your menu has at least one tag, and every tag is assigned to at least one KOT printer. Check item tags in the Admin Portal under Master Data → Item Tags.
Steps to add a KOT printer
- Tap Settings → Printers.
- Tap the KOT Printers tab.
- Tap Add Printer.
- Fill in the fields below.
- Tap Add Printer to save.
| Field | What to enter |
|---|---|
| Printer Name | A name for this station (e.g., "Hot Kitchen", "Bar") |
| Select Printer | Choose the physical printer from the registered printers list |
| Assign Tags | Select one or more tags - items with these tags print here |
Editing or deleting a KOT printer
- To edit: tap the printer row (or the pencil icon), make your changes, then tap Update.
- To delete: tap the trash icon and confirm.
INFO
Deleting a KOT printer removes the routing entry - it does not affect the physical printer or remove it from Manage Printers.
Bump Printer
A bump printer prints a compact slip when kitchen staff bump (mark as complete) an order on the Kitchen Display (KDS). This slip typically goes to the pass or expo station as a handoff confirmation - confirming the food is ready to serve.
INFO
A bump printer is only relevant if you use a Kitchen Display. If you only use KOT printers and no KDS, you do not need a bump printer.
Steps to assign a bump printer
- Tap Settings → Printers.
- Tap the Bump Printer tab.
- Select a printer from the Select Bump Printer dropdown.
- Tap Save.
TIP
Use a dedicated small-format (58mm) printer at the pass/expo station for bump slips - this keeps it separate from the main receipt printer and avoids mixing customer receipts with kitchen handoff slips.
Cash Drawer
The cash drawer connects to the POS through your receipt printer. When a cash payment is completed, the POS sends a signal to the bill printer, which opens the drawer via its cash drawer port.
Windows only
The cash drawer feature requires the Windows desktop app. On Android and iOS, the POS does not directly control a cash drawer.
How to physically connect a cash drawer
Most thermal printers have a dedicated cash drawer port on the back - a round RJ11 or RJ12 socket (similar to a phone line socket). Plug the cash drawer's cable into that port on the bill printer.
No additional software configuration is needed. Once the bill printer is set up and assigned, the drawer opens automatically on cash payments.
TIP
If your printer has two RJ ports, check the printer's manual - one port is for the phone line (not used here) and one is for the cash drawer. Using the wrong port will mean the drawer never opens.
Controlling which payment methods open the drawer
By default, the drawer opens on cash payments only. To change this:
- Tap Settings → Payment Methods.
- Find the payment method you want to change.
- Toggle Open Cash Drawer on or off.
- Tap Save.
Typical setup:
| Payment method | Open cash drawer |
|---|---|
| Cash | Yes |
| Card (EFTPOS) | No |
| Gift Card | No |
Paper size reference
| Paper roll width | Paper Width setting in POS |
|---|---|
| 58mm | 270px |
| 80mm | 384px |
Troubleshooting
| Problem | What to try |
|---|---|
| Test print fails | Check the printer is powered on and on the same Wi-Fi as the POS. On Android/iOS verify the IP address is correct. On Windows confirm the printer is registered in Windows Settings and shows as online there first. |
| Printer not found / unreachable | On Android/iOS: confirm the IP address is right and try pinging the printer from another device on the same network. On Windows: open Windows Settings → Printers and confirm the printer appears and is not offline. |
| Printer gets a different IP after restart | The printer is getting a new IP from your router (DHCP). Assign the printer a static (reserved) IP in your router, then update the IP address in Manage Printers (Android/iOS) or re-add the printer in Windows Settings. |
| USB or Bluetooth printer not appearing (Android/iOS) | For USB: confirm the cable is firmly connected and the printer is powered on. For Bluetooth: pair the printer in your device's Bluetooth settings first, then return to Manage Printers - it appears automatically once paired. |
| Paper jammed | Open the printer cover, carefully remove the jammed paper, reload the roll with the shiny side facing the print head, then close the cover. |
| Receipt is blank or very faint | The paper is loaded the wrong way. Thermal paper only prints on one side - reload it with the shiny/coated side facing the print head. |
| Cash drawer does not open | Check the cable between the drawer and the printer is firmly seated in the RJ port. Confirm you are running the Windows desktop app. |
| Kitchen items not printing | Check the item's tags in the Admin Portal and confirm those tags are assigned to a KOT printer. Items with no matching tag produce no ticket. |
| Bump slips not printing | Confirm a bump printer is assigned in the Bump Printer tab. Verify the physical printer is powered on and reachable. Check the paper roll. |
| Wrong items printing at a station | A tag is assigned to the wrong KOT printer, or an item has an incorrect tag. Review tags in Admin Portal → Master Data → Item Tags and check each KOT printer's assigned tags. |
For more help, see Troubleshooting.
Next steps
- Receipt Customisation - Customise the receipt layout, logo, and footer
- Payment Gateways - Connect your EFTPOS terminal
- Device Settings - Find the terminal IP address for displays