
First-Time Setup
First-time setup connects the POS app on your device to your business account - it tells the app which restaurant location it belongs to and which billing terminal it is. You only do this once per device.
Manager only
First-time setup requires your admin username and password. Regular staff do not have access to these credentials.
What you need before you start
Have these three things ready before you tap Get Started:
| What | Where to get it |
|---|---|
| Client ID | A number given to your business when you registered with Pratham. Contact the Pratham team if you don't have it. |
| Admin username & password | Created when your account was set up |
| Terminal | A terminal must already exist in the Admin Portal for your outlet before you can select it here |
INFO
If you don't have a terminal yet, ask your administrator to create one in the Admin Portal before continuing.
Step 1 - Welcome screen
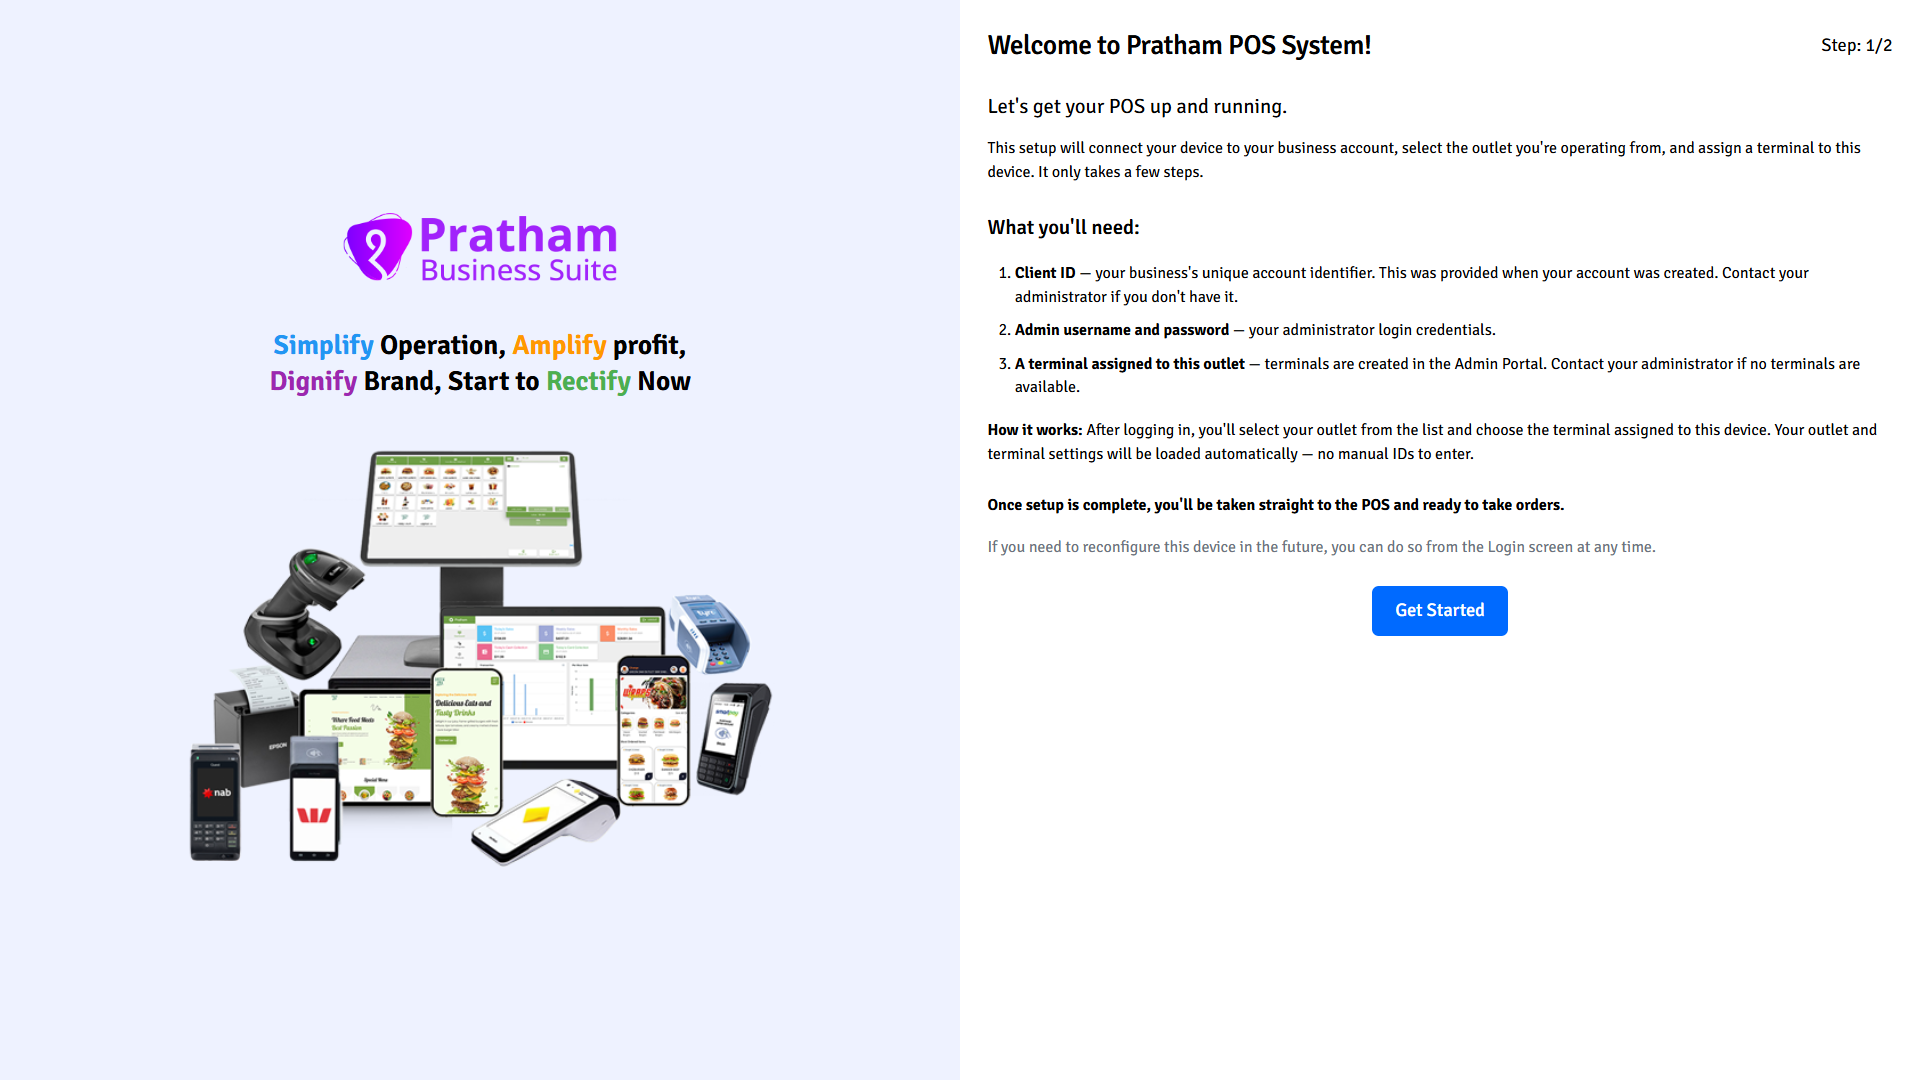
When you open the app for the first time, the Welcome screen appears. It lists what you'll need for setup.
- Read the on-screen checklist to confirm you have your Client ID, credentials, and a terminal ready.
- Tap Get Started.
Step 2 - Admin login
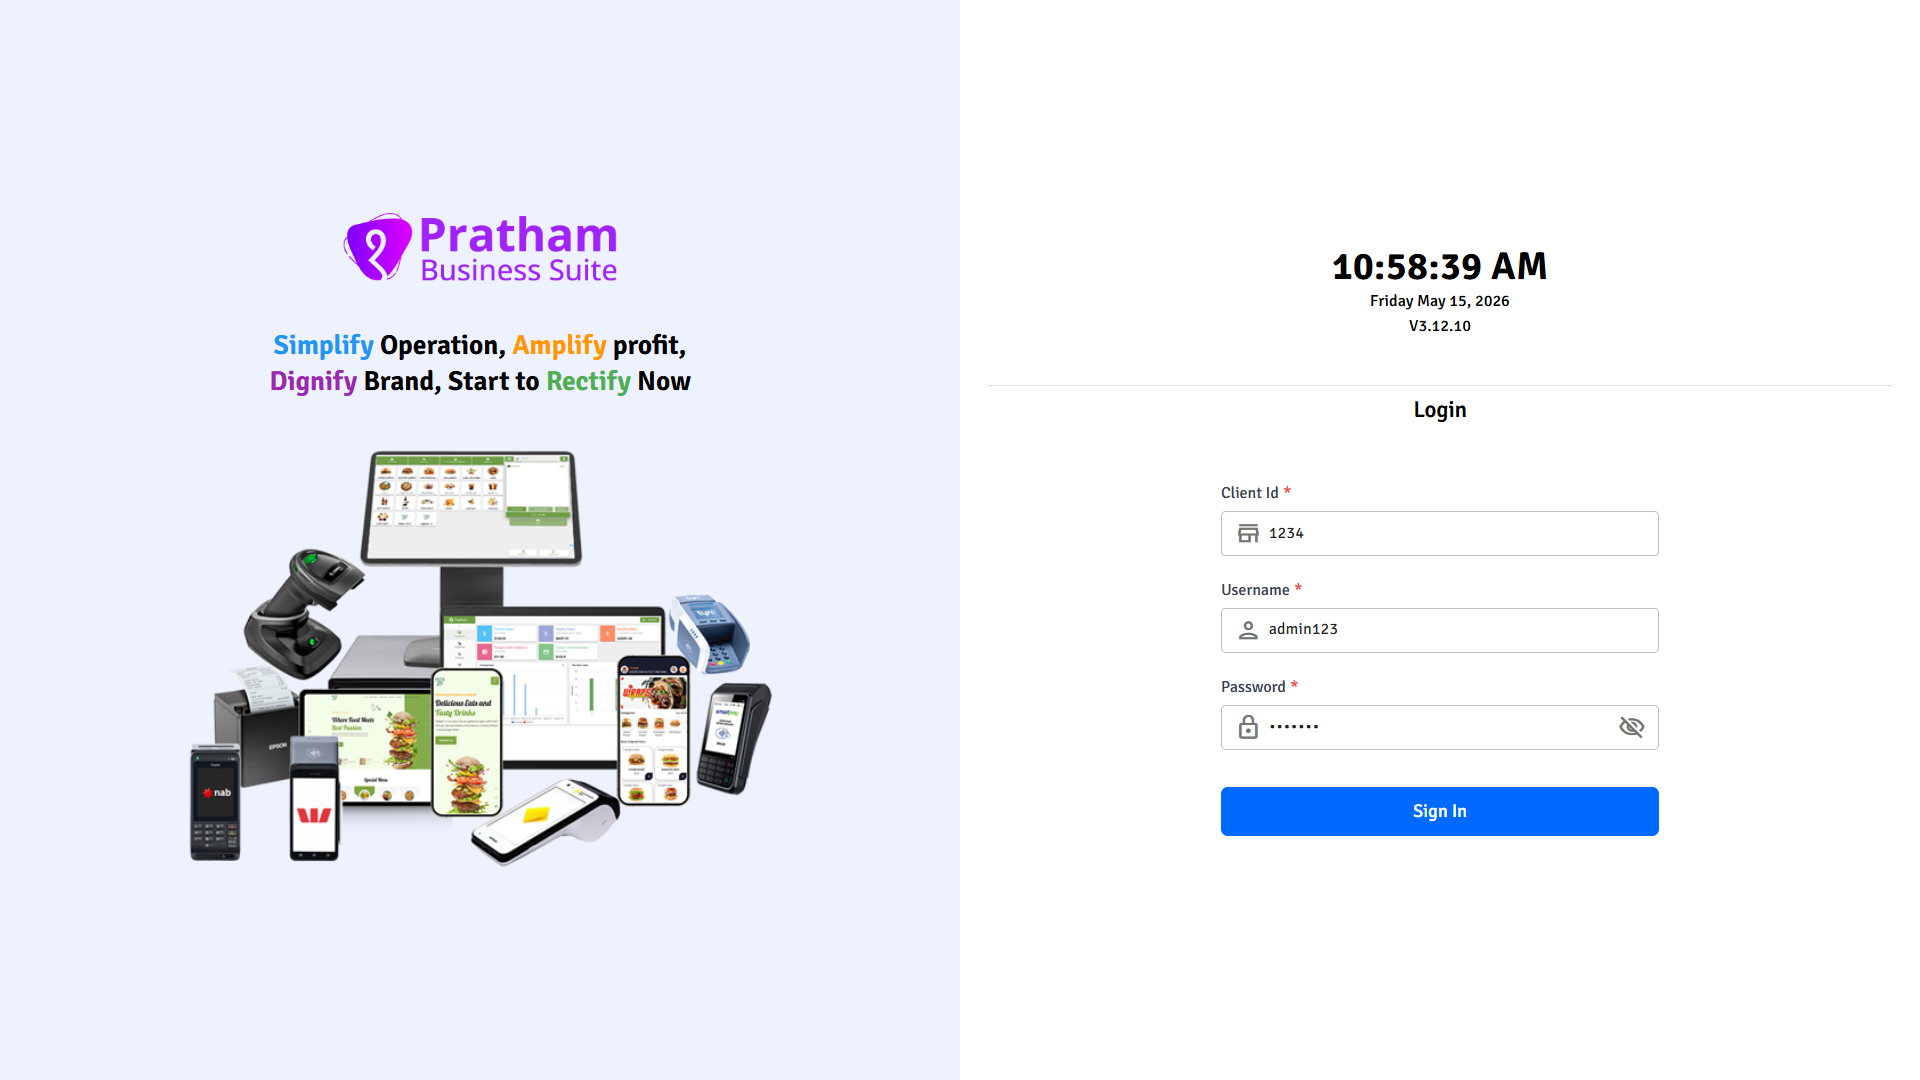
The login screen asks for your admin credentials to verify your identity.
- Enter your Client ID (numbers only - not your business name).
- Enter your Username.
- Enter your Password.
- Tap Sign In.
Login not working?
Double-check that the Client ID is a number, not text. If you still can't log in, contact your administrator - they may need to reset your password or confirm your Client ID.
Step 3 - Select your outlet
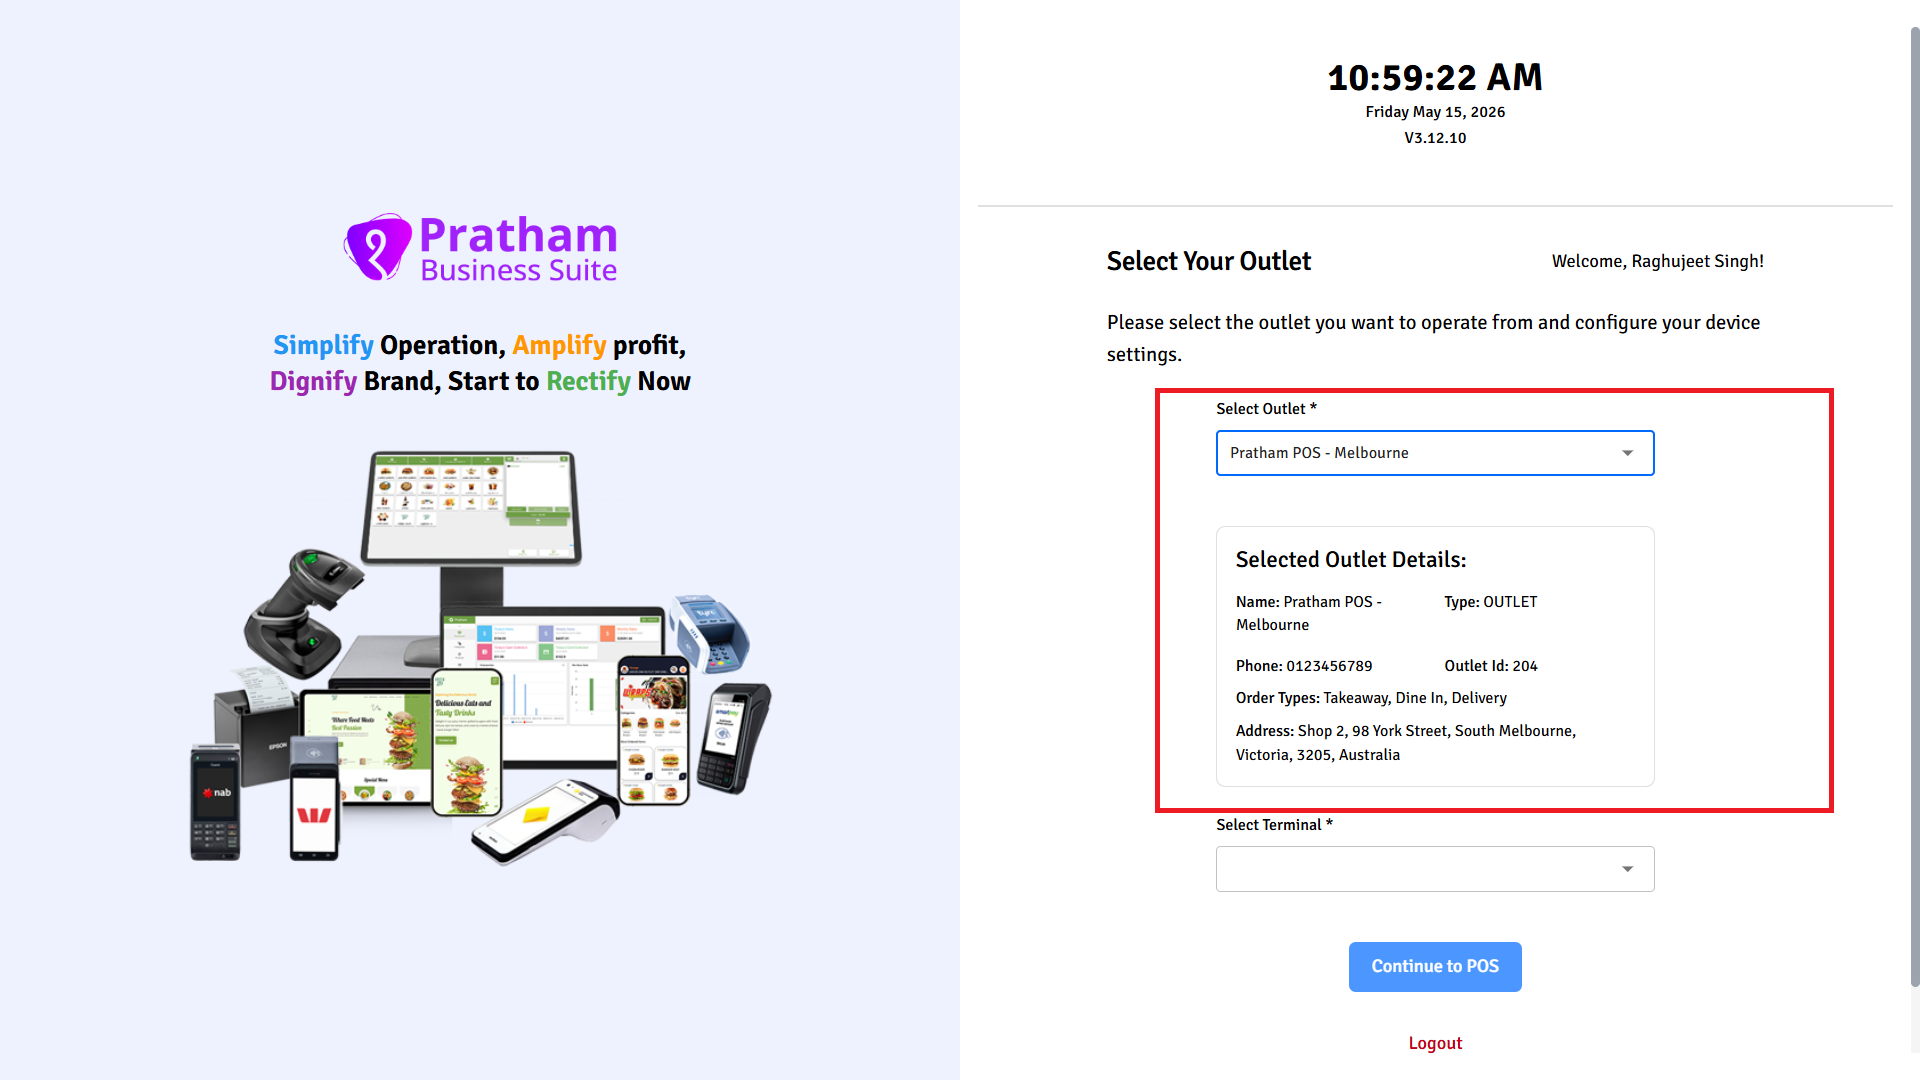
After login, choose which restaurant location this device belongs to.
- Tap the Select Outlet dropdown.
- Select your location from the list.
- Check the details shown on screen - name, phone number, address, and supported order types.
- Confirm it is the correct outlet before continuing.
WARNING
Choosing the wrong outlet means orders, reports, and receipts will be linked to the wrong location. Take a moment to confirm the address shown matches your venue.
Step 4 - Select a terminal
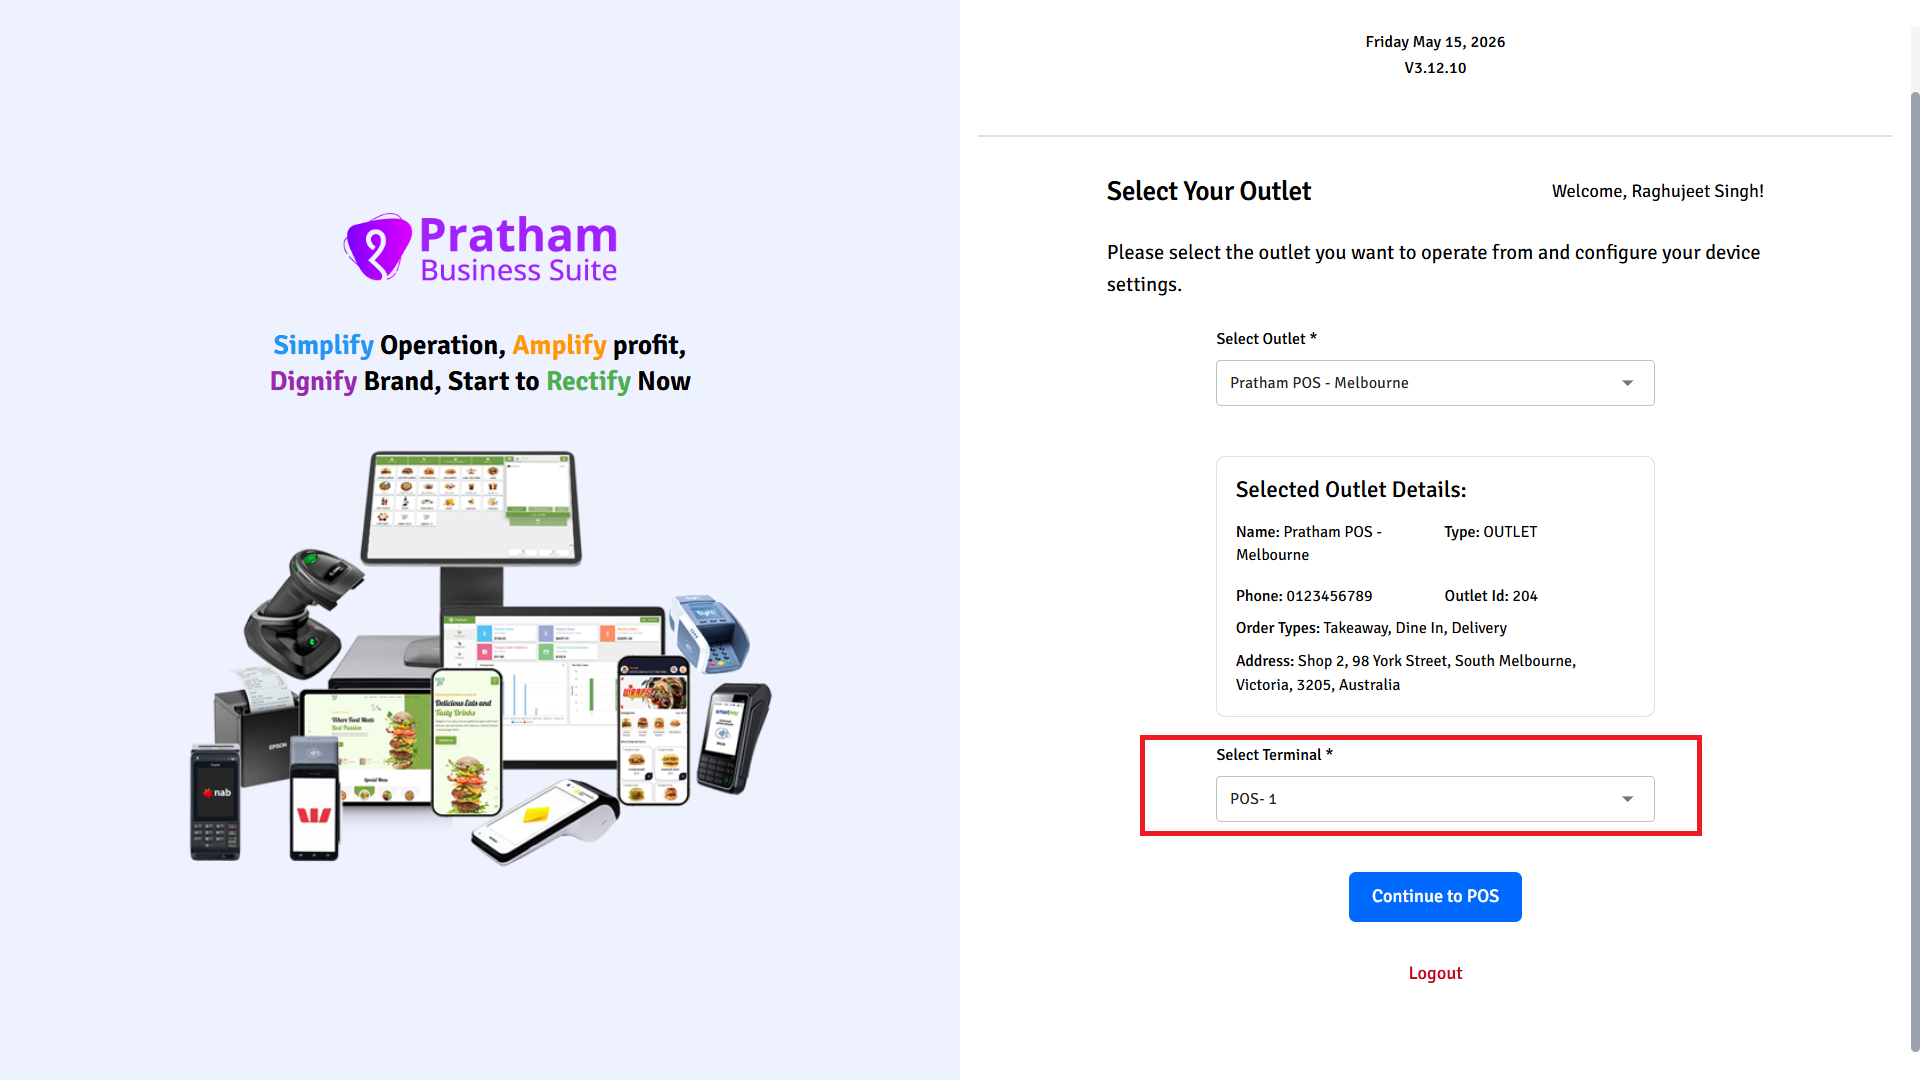
A terminal is the named register for this device. Select the one assigned to this device.
- Tap the Select Terminal dropdown.
- Select the terminal name assigned to this device.
- Tap Continue to POS.
No terminals in the list?
Terminals are created in the Admin Portal, not in the POS app. Ask your administrator to create a terminal for this outlet and then come back to this step.
Terminal already in use
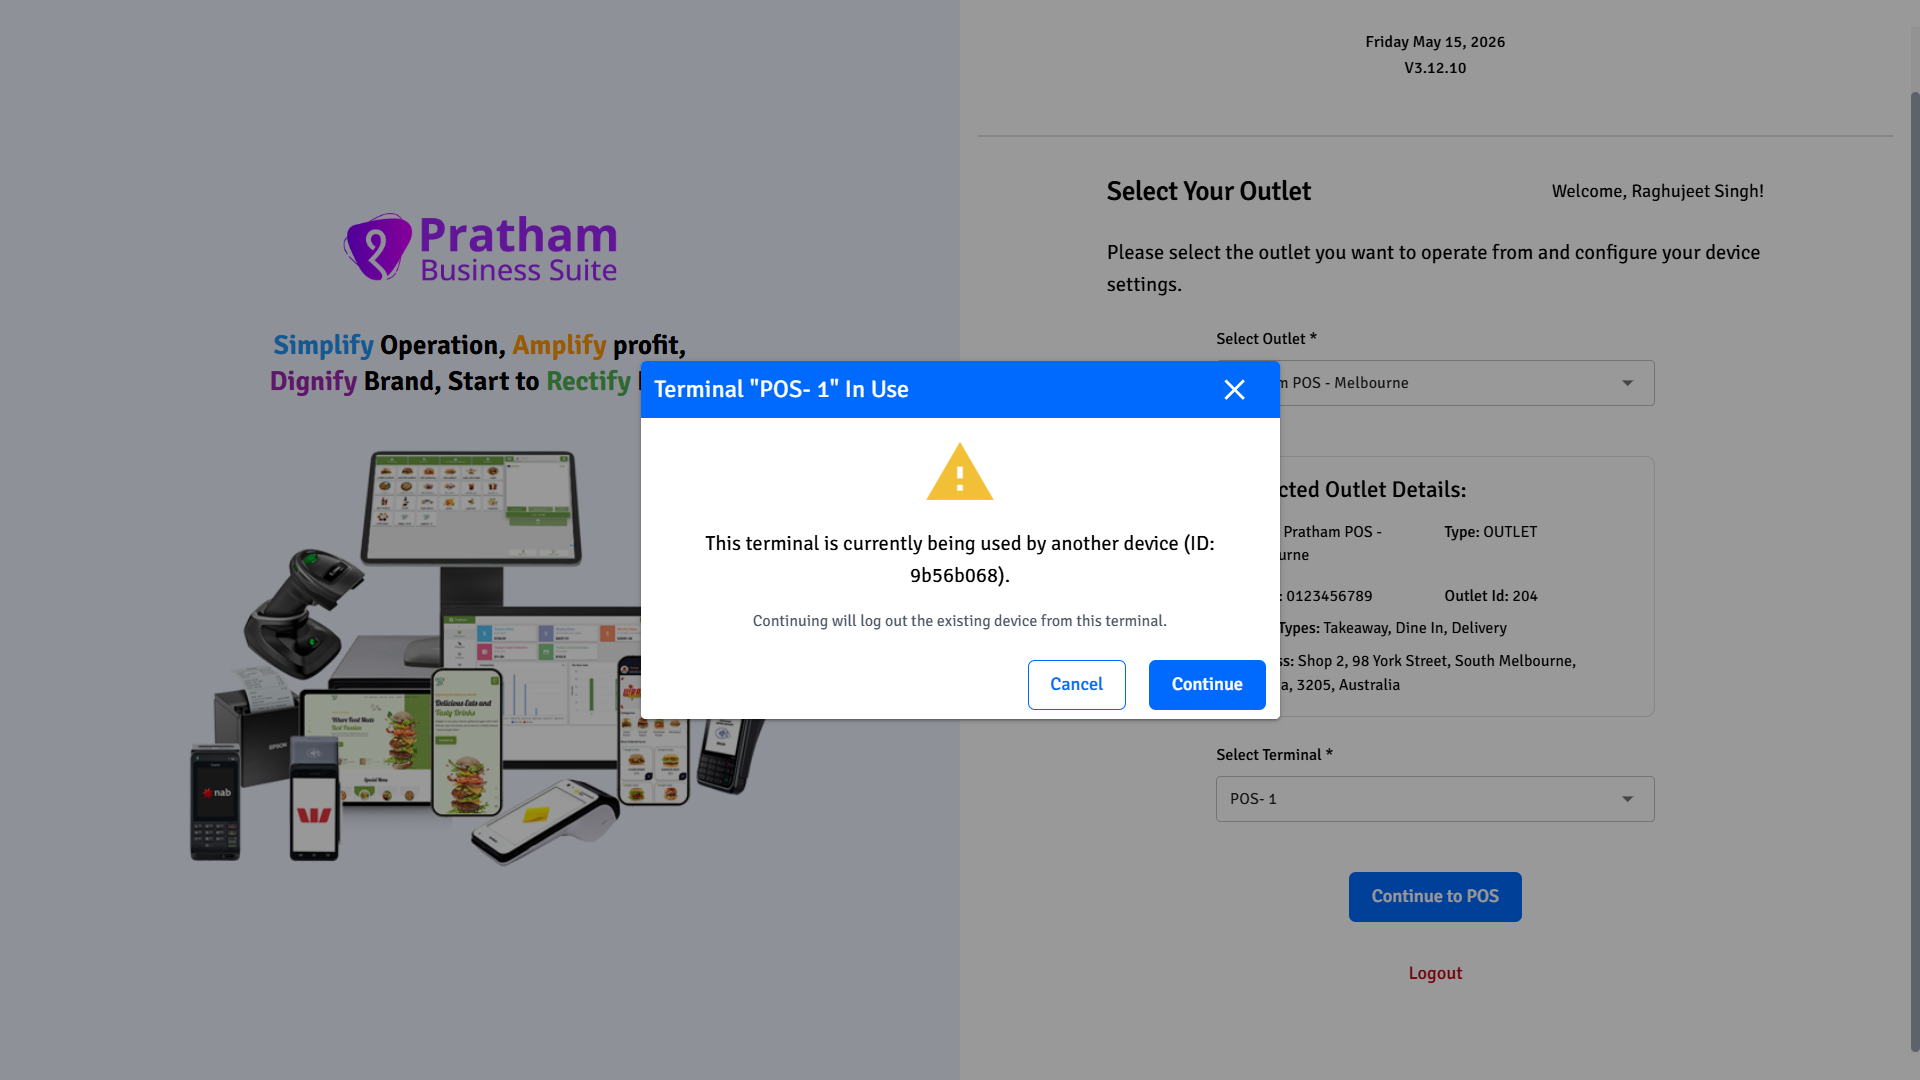
If the terminal you selected is currently registered to a different device, a warning appears.
WARNING
Tapping Continue will log the other device out of this terminal immediately. Only do this if you are intentionally moving the terminal to this device - for example, replacing a broken device.
- Tap Continue to take over the terminal on this device.
- Tap Cancel to go back and choose a different terminal.
Step 5 - Setup complete
The POS loads and is ready to use. Your next steps are typically:
- POS Settings - set your store details, order types, and preferences
- Printers & Cash Drawer - add your printer and cash drawer
- Payment Gateways - connect your EFTPOS terminal
Reconfiguring the app
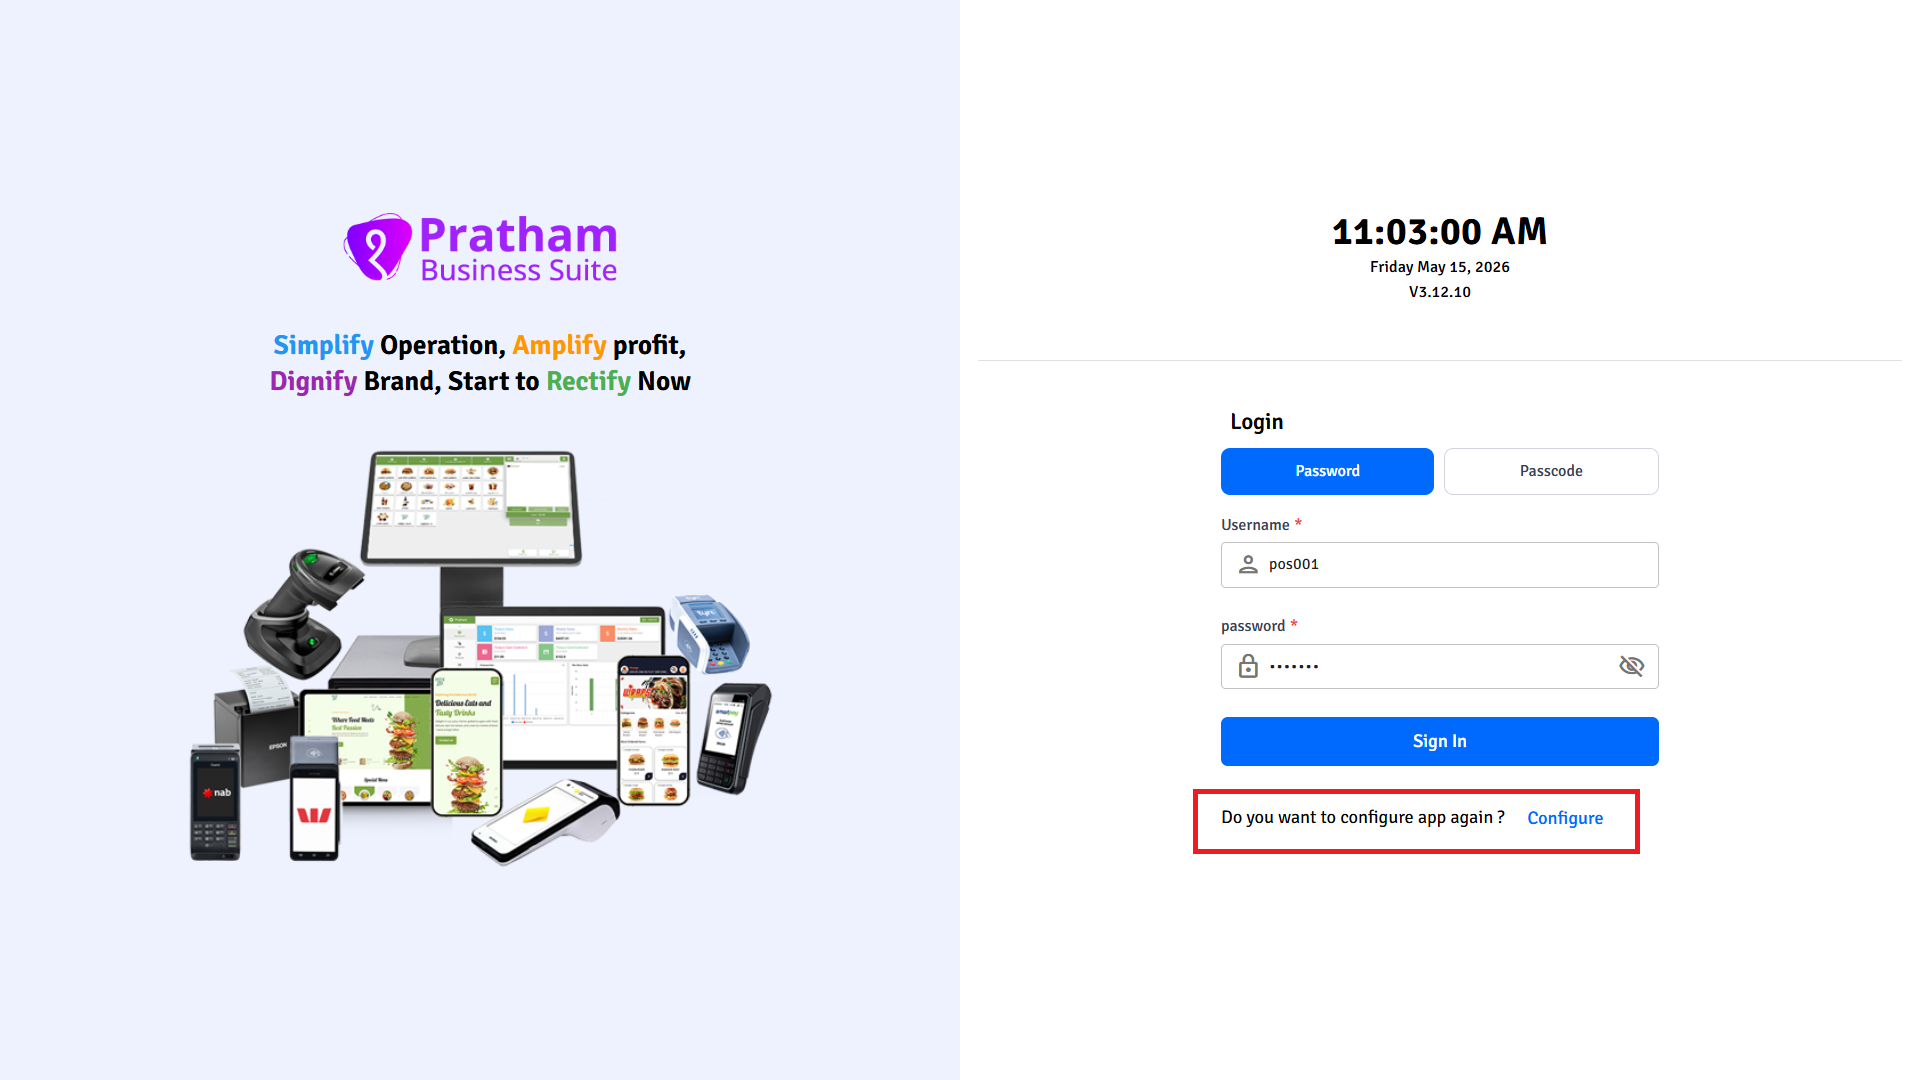
If you need to reset the app and run setup again - for example when replacing a device or moving to a different outlet - you can do this from the staff login screen without going into Settings.
- On the Staff Login screen, tap Configure (shown next to "Do you want to configure app again?").
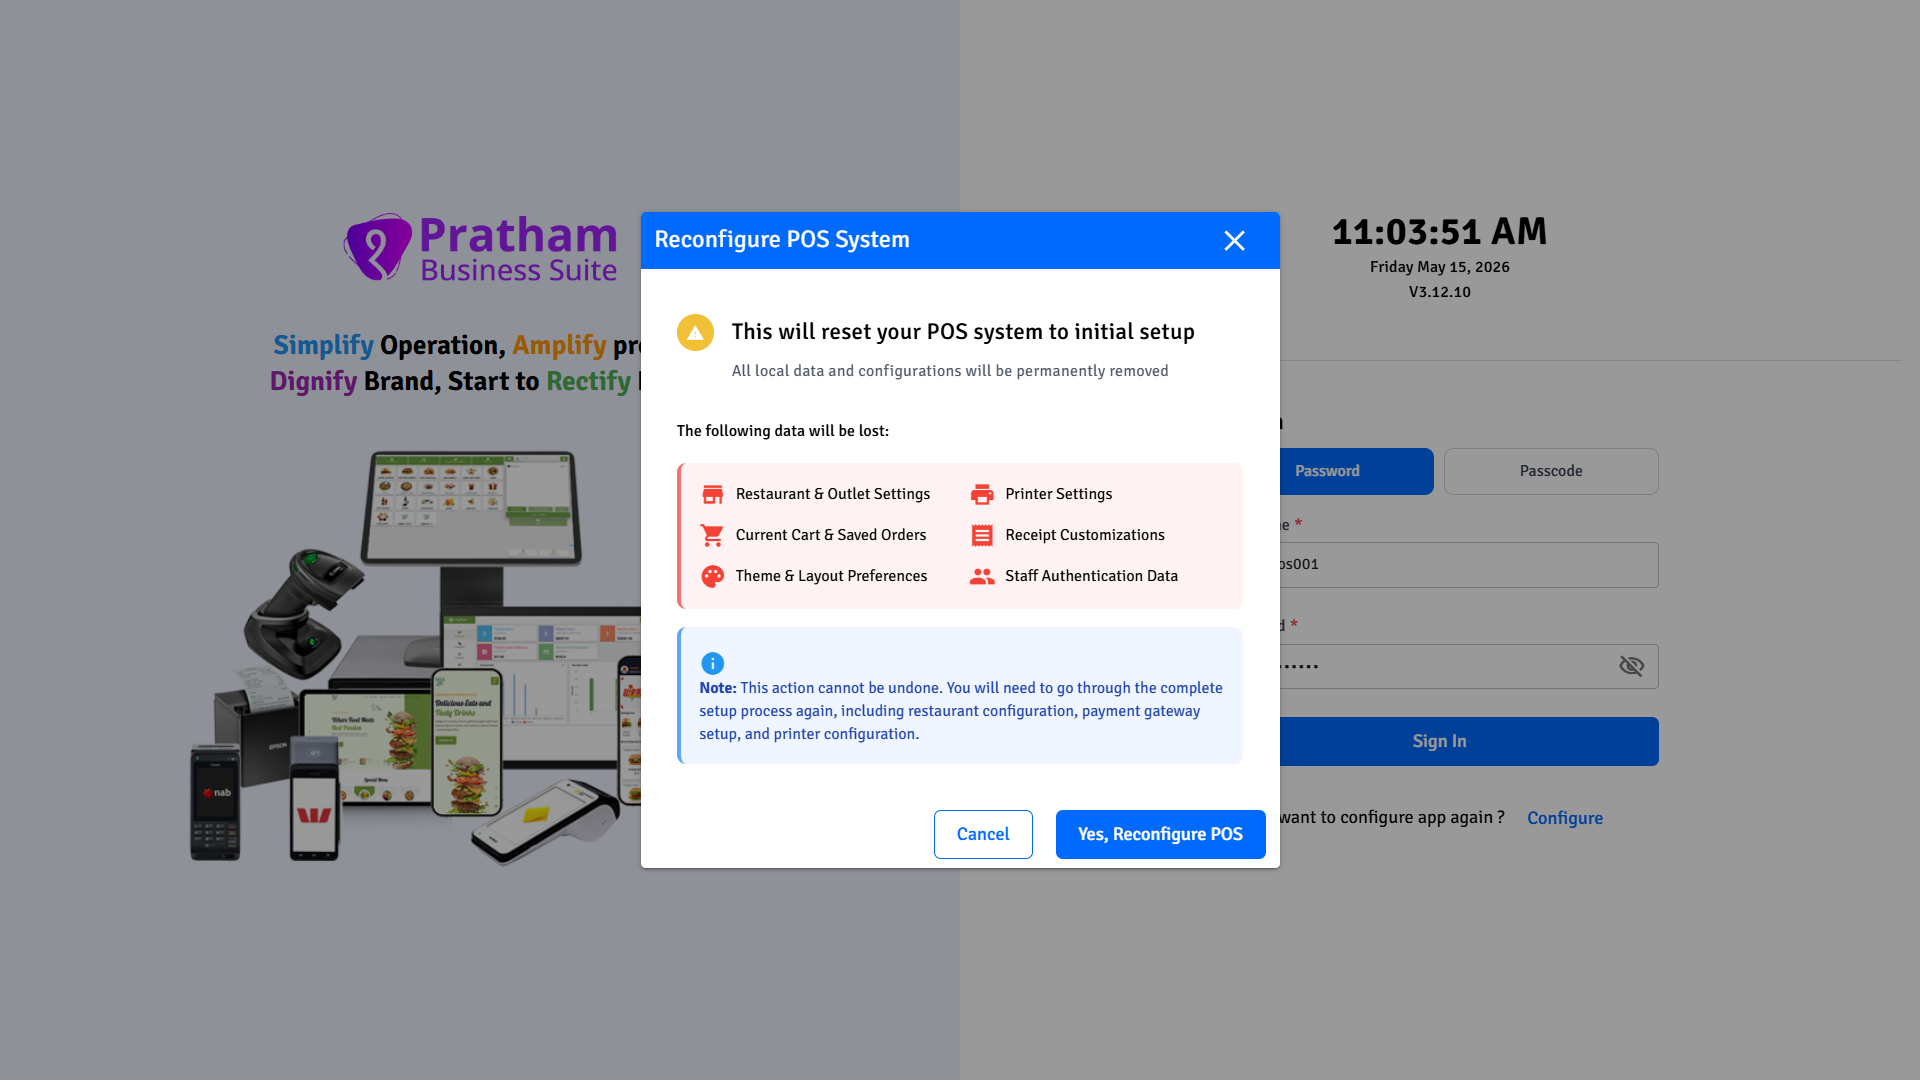
- A confirmation screen lists all the data that will be deleted from this device.
The following data is permanently removed from this device only:
- Restaurant & outlet settings
- Printer settings
- Current cart and saved orders
- Receipt customisations
- Theme and layout preferences
- Staff authentication data
- Tap Yes, Reconfigure POS to confirm.
This cannot be undone
Once you confirm, all local settings on this device are cleared. Your orders, customers, and menu data stored on the server are not affected - only this device's local configuration is removed. You will need to complete the full setup process again.