
Shift Management
This page covers opening and closing your shift. Follow these steps each day to keep your register accurate and your orders running smoothly.
Opening the shift
Before taking your first order:
- Log in with your username and password.
- Check the receipt printer is powered on and has paper loaded.
- Count the starting cash float in the till.
- Report any printer or hardware issues to your manager before starting.
Taking an order
This is the most common task you will do on the POS. Every order follows these steps.
Step 1 - Select an order type
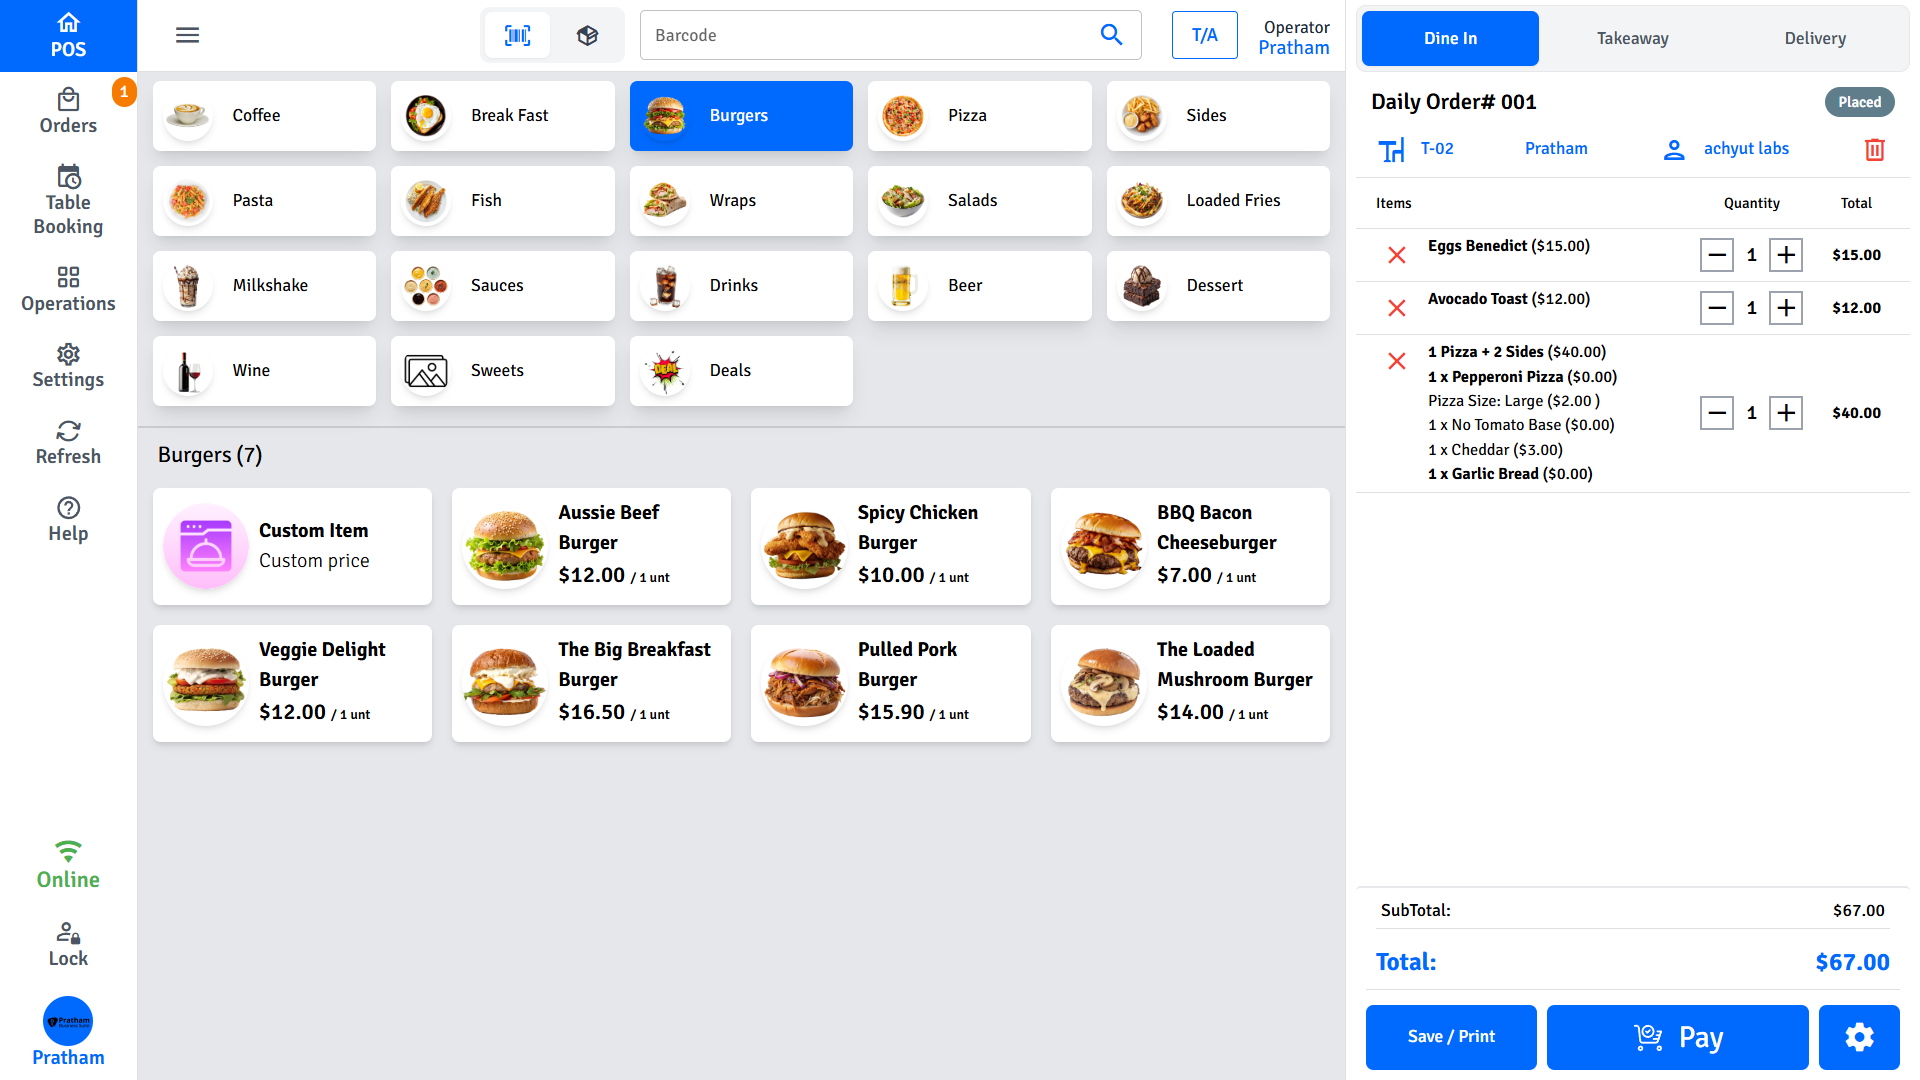
Tap Dine-In, Takeaway, or Delivery in the cart panel.
Step 2 - Assign a table (Dine-In only)
- Tap the Table selector in the cart panel.
- Tap an available table from the list or floor plan.
Step 3 - Add a customer (optional)
- Tap Search Customer and type the customer's name, phone, or email.
- Tap their name in the results to link them to the order.
- If they are new, tap New Customer, fill in their details, and tap Save.
- For a walk-in with no profile, skip this step or enter just a name.
Step 4 - Add items
- Tap a category in the item grid to browse its items.
- Tap an item to add it to the cart.
- If a modifier popup appears (e.g., sauce choice, extras), select the options and confirm.
- If the item has variants (e.g., Small, Medium, Large), select the size before confirming.
Step 5 - Review the cart
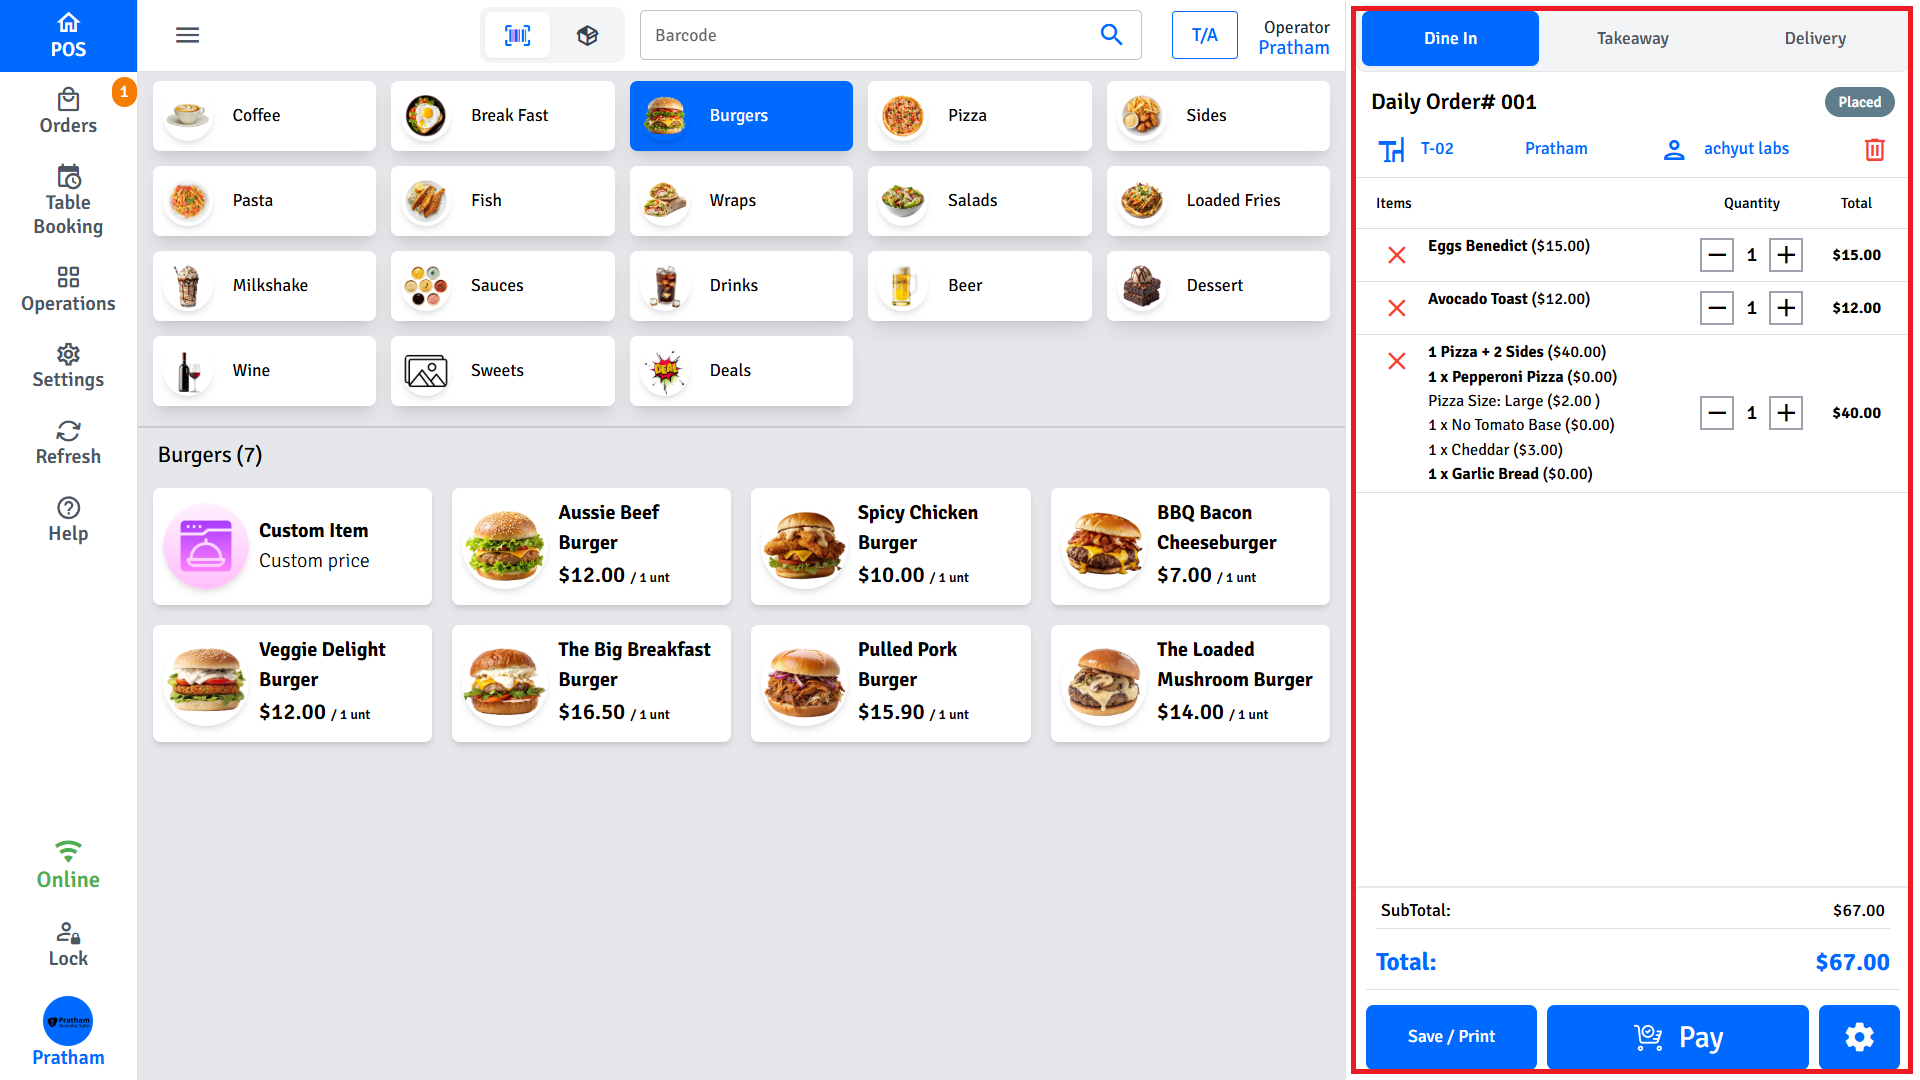
Check the cart panel on the right:
- Tap the quantity field on a line item to change the quantity.
- Tap the delete icon to remove an item (a confirmation may appear).
- Tap the note icon on a line item to add a kitchen instruction (e.g., "no salt", "well done").
Step 6 - Apply a discount or surcharge (optional)
- Tap Add Coupon and enter the code, or select an auto-applied offer.
- Tap Discount and enter the amount or percentage.
- Tap Surcharge and enter the amount or percentage (e.g., for a public holiday fee).
INFO
Staff may need a manager PIN to apply discounts above the configured limit. Ask your manager if the PIN prompt appears.
Step 7 - Checkout
Tap Checkout or Pay Now to open the payment screen. See Payments for all payment methods.
Step 8 - Print receipt
After payment is confirmed, the POS prints the receipt based on your settings:
| Copy | Purpose |
|---|---|
| Customer Copy | Given to the customer |
| Kitchen Copy | Sent to the kitchen for preparation |
| Merchant Copy | Your business's record of the transaction |
| Label Copy | Item labels for packaged takeaway items |
| Customer Info Copy | Includes customer contact details - useful for delivery |
Printing may happen automatically or ask you to confirm - your manager configures this in POS Settings.
Buzz numbers
A buzz number is a short identifier assigned to a takeaway order so staff can call out a number when it is ready, rather than a customer's name. The number prints on the receipt and appears on the customer display.
When enabled, a Buzz# button appears in the cart header.
INFO
Buzz numbers must be enabled by your manager in Settings → Buzz Numbers. If the Buzz# button is not visible, buzz numbers are not enabled at this location.
Assign a buzz number
- With an order open in the cart, tap the Buzz# button in the cart header.
- A list of available buzz numbers appears.
- Tap a number to assign it to the order.
Remove a buzz number
- Tap the Buzz# button on the current order.
- Tap Remove at the bottom of the list.
The buzz number prints on the customer receipt and appears in the cart header so staff know which number to call out.
Handle multiple open orders
The POS keeps several orders open at the same time so you can serve multiple tables or counter customers without losing any work. Each order is independent — switching between them does not affect items, discounts, or totals on any other order.
- Each open order appears as a tab or in the cart selector.
- Tap between tabs to switch to a different order.
- Each order is saved independently - switching away does not lose any items.
View order history
To look up a past order during your shift:
- Tap Orders in the navigation.
- Use the filters (date, status, order type, payment method) to find the order.
- Tap the order to open it.
From the order detail screen you can:
- Tap Reprint Receipt to reprint any copy
- Tap Void Order to cancel it (manager PIN may be required)
- Tap Refund to return payment to the customer (manager PIN may be required)
Order status reference
| Status | What it means |
|---|---|
| Placed | Order submitted, awaiting kitchen acceptance |
| Accepted | Kitchen accepted the order |
| In Progress | Kitchen is preparing the order |
| Ready to Serve | Order is ready for pickup or table service |
| Finished | Order completed and served |
| Declined | Order rejected by kitchen |
| Cancelled | Cancelled before preparation |
| Void | Voided before or during payment |
| Refunded | Payment has been refunded |
| Out for Delivery | Driver has picked up the order (delivery orders only) |
Close the shift (Cash Up)
At the end of your shift:
- Count all cash in the till.
- Tap Operations → Cash Up in the navigation.
- Follow the reconciliation process.
See Cash Up for detailed instructions.
Tips for busy periods
- Set the default order type to the most common type for your shift - saves a tap on every order.
- Always search for a customer before creating a new one - avoids duplicate profiles.
- Reprint any receipt from Order History if the printer was busy or paper ran out.
FAQs
A modifier dialog appeared and got stuck — the popup won't close. What do I do?
Tap outside the dialog or tap Cancel to dismiss it without adding the item. If the screen is unresponsive, restart the POS app — open orders are saved and restored automatically after you log back in.
I applied a discount but a manager PIN prompt appeared. What is happening?
Your venue requires manager approval for discounts above a set limit, or for all discounts. Ask a manager to enter their PIN to authorise the discount. If this should not be required, ask your manager to review the Authorized Discount setting in POS Settings.
Can I reopen a shift after closing it?
Closing a shift (Cash Up) finalises the reconciliation for that period. You cannot reopen a completed cashup. If you made an error, ask your manager — a manager can delete the cashup record and redo it from Operations → Cash Up.
What happens to open orders if the app closes unexpectedly?
All order data is saved to the device continuously. When you log back in, the POS restores all open orders automatically. No orders are lost due to app crashes or unexpected closures.