
Orders
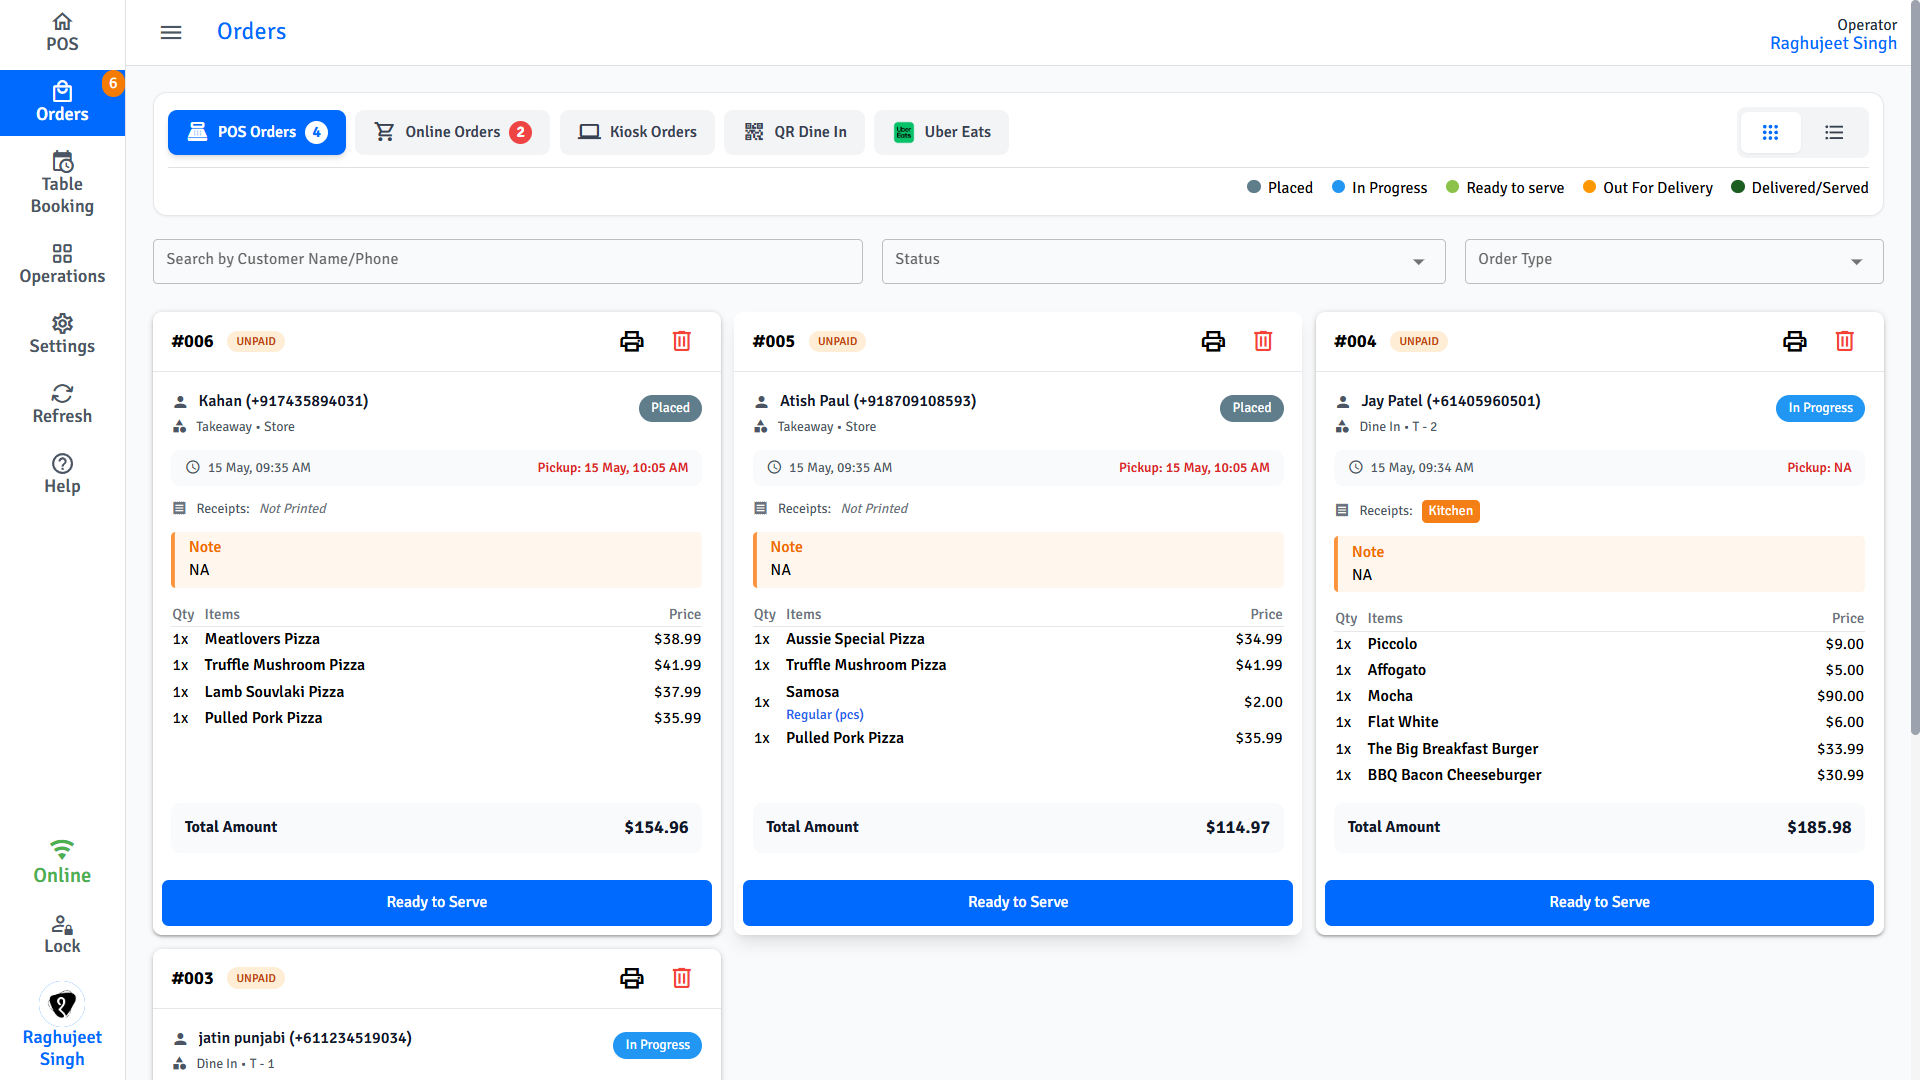
The Orders screen shows all active, unfinished orders across every channel - POS, Online, Uber Eats, QR Dine-In, and Kiosk. Use this screen to accept or decline incoming orders, update their status, and print order tickets.
Order types
Dine-In
Use for customers eating at a table in your venue.
- Assign a table when creating the order.
- Add items across multiple rounds - the order stays open until the customer pays.
- Supports split payment so guests can pay separately.
Takeaway
Use for customers collecting from the counter.
- No table required.
- Assign a buzz number to call the customer when the order is ready.
Delivery
Use for orders delivered to a customer's address.
- A customer address is required - either from a saved profile or entered manually.
- Delivery zone and charges are calculated automatically based on the address.
- Delivery must be enabled in POS Settings by your manager.
Create an order
- Select an order type (Dine-In, Takeaway, or Delivery) in the cart panel.
- For Dine-In - tap the Table selector and choose an available table.
- Tap Search Customer to add a customer to the order (optional, but required for delivery).
- Tap items in the item grid to add them to the cart.
- Select modifiers, variants, or add kitchen notes when prompted.
- Apply discounts or coupons if needed.
- Tap Checkout and process payment.
INFO
For the full detail on every checkout feature - discounts, surcharges, coupons, cash discount, delivery charges, loyalty, gift cards, saving orders, and receipt printing - see Ordering & Checkout.
Add items to the cart
The left side of the POS screen is the item panel. Tap a category, then tap an item to add it to the cart.
Some items open a customisation dialog before being added - to select a size, extras, or other options. See Modifiers & Variants for the full walkthrough.
For Half & Half items, see Half & Half.
Kitchen notes
- Tap the note icon on any cart line item.
- Type the instruction (e.g., "well done", "no salt", "allergy - no nuts").
- The note prints on the kitchen ticket.
Deals and combos
| Type | How it works |
|---|---|
| Combo Deal | A pre-packaged set of items at a fixed price. Select items from each required category when prompted. |
| BOGO | Buy One Get One - applied automatically when qualifying items are in the cart. |
| Bundle Deal | Multiple items grouped at a reduced total price. |
TIP
For the full step-by-step flow of each deal type, see Deals.
Manage open orders
Switch between orders
If multiple orders are open (e.g., multiple dine-in tables):
- Tap the order tab or cart selector to switch.
- Each order is saved independently - switching away does not lose anything.
Edit an order
Before payment, you can:
- Add or remove items
- Change item quantities
- Update modifiers or notes
- Change the table assignment
- Add or change the linked customer
Hold an order
Leave any order open and come back to it. Tap a different order tab or start a new order - the held order stays exactly as you left it.
To save a takeaway or delivery order with a customer name and pickup time, use Save / Print - see Save an Order.
Online orders
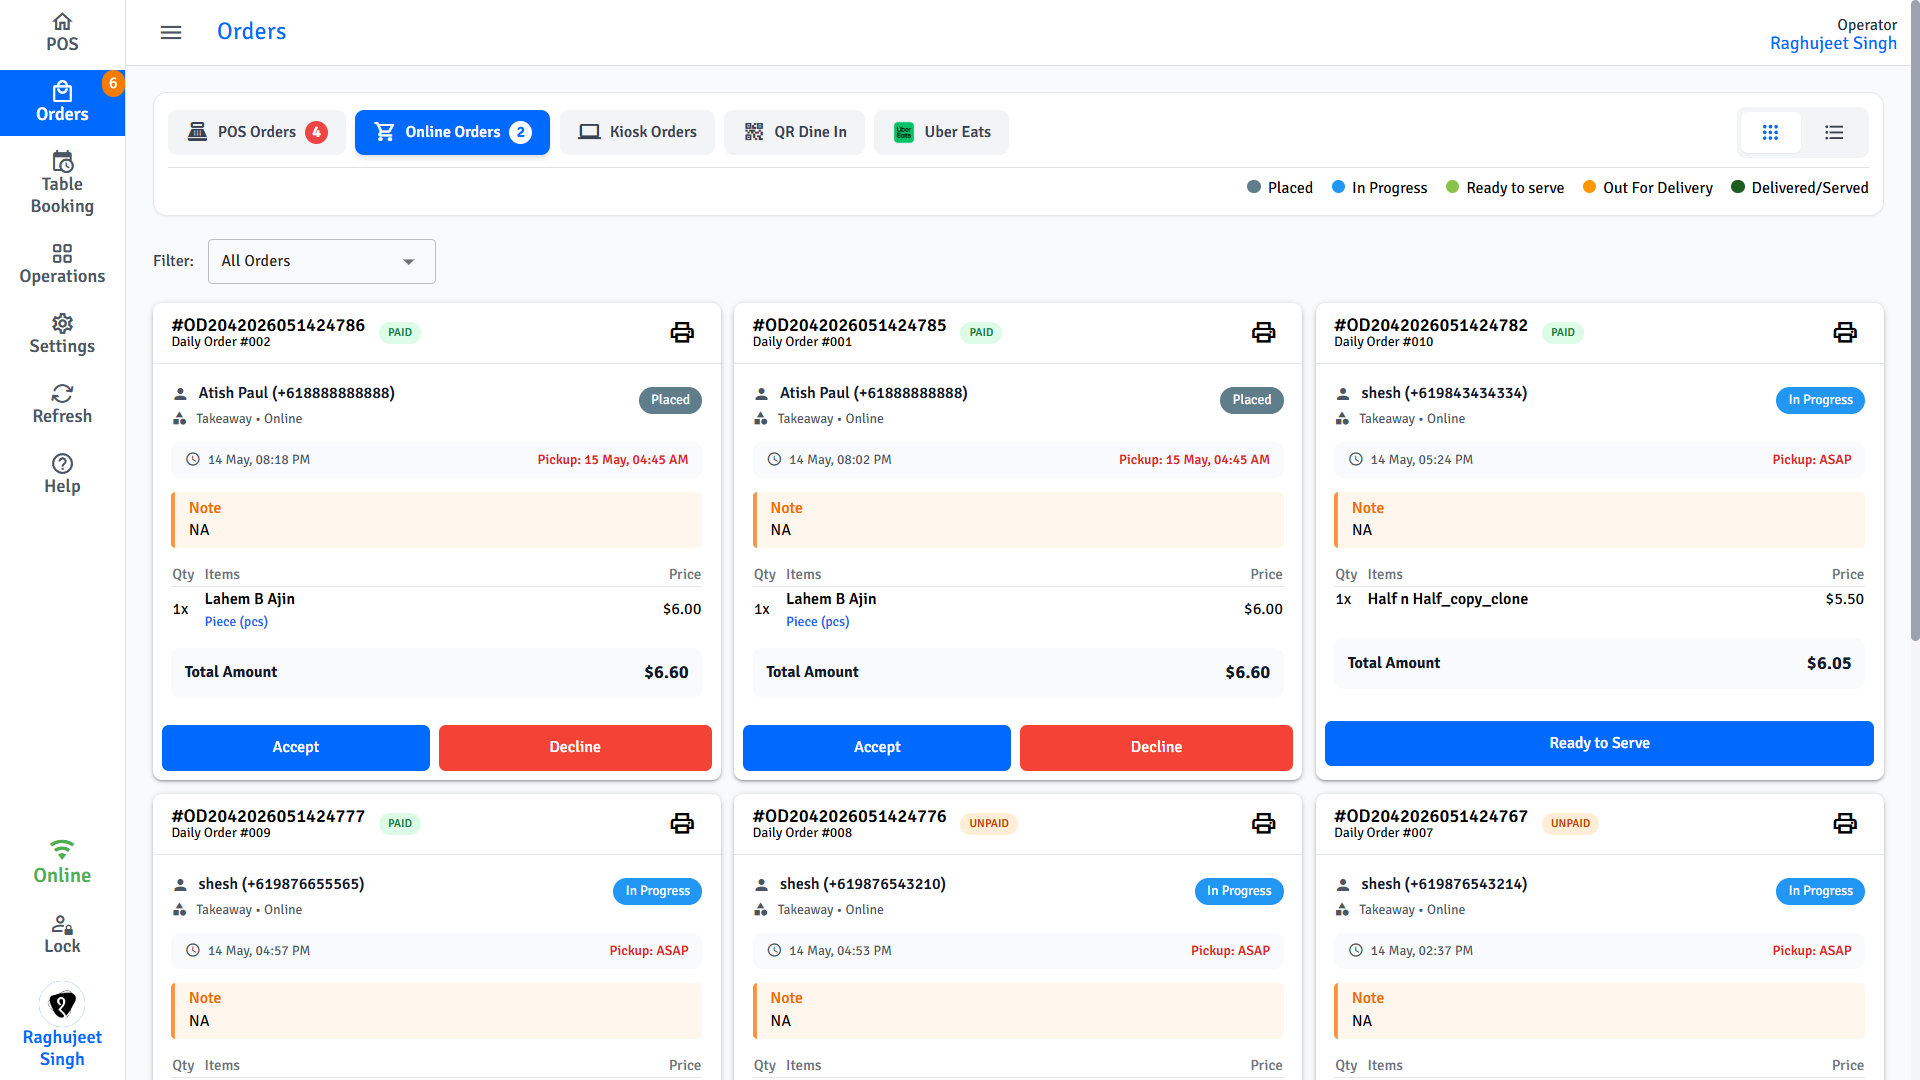
Online orders come from customers ordering through your restaurant's website or app. They appear in the Orders screen.
- Tap Orders in the navigation.
- New orders appear with a sound notification and badge.
- Tap the order to review it.
- Tap Accept to confirm and send to the kitchen, or Decline to reject (a reason is required).
TIP
Enable Auto Accept Online Orders in Settings → General so incoming online orders are accepted and sent to the kitchen automatically without staff review.
Uber Eats orders
Uber Eats orders come through the Uber Eats integration and appear directly in the Orders screen.
- Tap Orders - Uber Eats orders are marked with the Uber Eats badge.
- Tap the order to review items.
- Tap Accept or Decline.
- Accepted orders go to the kitchen and follow the standard status flow.
INFO
Uber Eats order details (customer name, items, delivery address) are read-only and cannot be edited on the POS. Uber Eats integration must be configured by your manager before orders can be received.
QR Dine-In orders
QR Dine-In lets customers scan a QR code at their table and place their own order from their phone.
- The order appears in the Orders screen linked to the scanned table.
- Tap the order, then tap Accept or Decline.
- Once accepted, the order goes to the kitchen automatically.
- Customers can scan again to add more items in additional rounds.
INFO
QR codes and the online menu must be set up by your manager in POS Settings before this feature is available.
Kiosk orders
Kiosk orders are placed by customers at a self-service kiosk in your venue.
- Kiosk orders appear automatically in the Orders screen once the customer pays.
- They go directly to the kitchen - no staff acceptance needed.
- Staff can view, reprint, or void kiosk orders from this screen.
INFO
Kiosk terminals must be set up and paired by your manager before use.
Void an order
Voiding cancels an order that has not yet been fully processed.
- Tap Orders in the navigation.
- Find and open the order.
- Tap Void Order.
- Enter the reason for voiding.
- Enter a manager PIN if prompted.
INFO
Voided orders are tracked in Cash Up reports. If an order has already been paid, use Receipts & Refunds instead.
FAQs
What is the difference between Void and Refund?
Void cancels an order that has not yet been fully paid — no money has changed hands, so nothing needs to be returned. Refund is for orders that are already paid — it returns money to the customer via the original payment method. If an order is paid, always use Refund, not Void.
The Accept button is greyed out on an incoming online order. Why?
The Accept button is only active when the order is in Placed status. If the order has already been accepted, declined, or timed out, the button is disabled. Check the order status label at the top of the order detail screen.
A customer wants to change their order after I sent it to the kitchen. What do I do?
Open the order and edit the cart — add, remove, or adjust items before payment. Changes send an updated ticket to the kitchen. If the item has already been prepared, add a kitchen note on the new or replacement item to explain the change.
Why can't I find an order in the Orders screen?
The Orders screen shows active, unfinished orders only. Completed and paid orders are in Receipts & Refunds (Operations → Receipts & Refunds). Use the date filter and search bar there to find past orders.