Item tags — create, edit, view, delete
Menu: Master Data Management → Item tags
Here you manage tag categories and the tags inside them. Tags help organise or label items on menus, reports, or promotions (your administrator defines how they are used).
Page header
- Title: Item tags
- Description: explains that you manage categories and tags for organising items.
- Add category — opens a new category (only if your role may create item tags).
Categories table
Columns typically include: Icon, Category name, Description, Tag count, Type, and Actions.
- While data loads, the table shows a loading row.
- If there are no categories yet, you see a friendly message inviting you to create the first category.
How to create an item tag category
- Click Add category.
- Fill Name and other fields shown (such as slug, description, icon with the emoji picker, and colour).
- Colour must be a valid hex value such as #4CAF50 or #FFF — invalid colours show a clear error message.
- You can add new tags inside the same flow: use add tag style controls, fill name (slug and short code often fill in automatically from the name), description, icon, and colour per tag.
- Save the category. Success and error messages appear on screen.
How to edit an item tag category
- Click Edit on the row.
- Change category fields and existing tags, or add more tags.
- Save. Tag colour rules are the same as on create.
How to view an item tag category
- Click View (eye icon).
- Read-only layout shows how the category and its tags look.
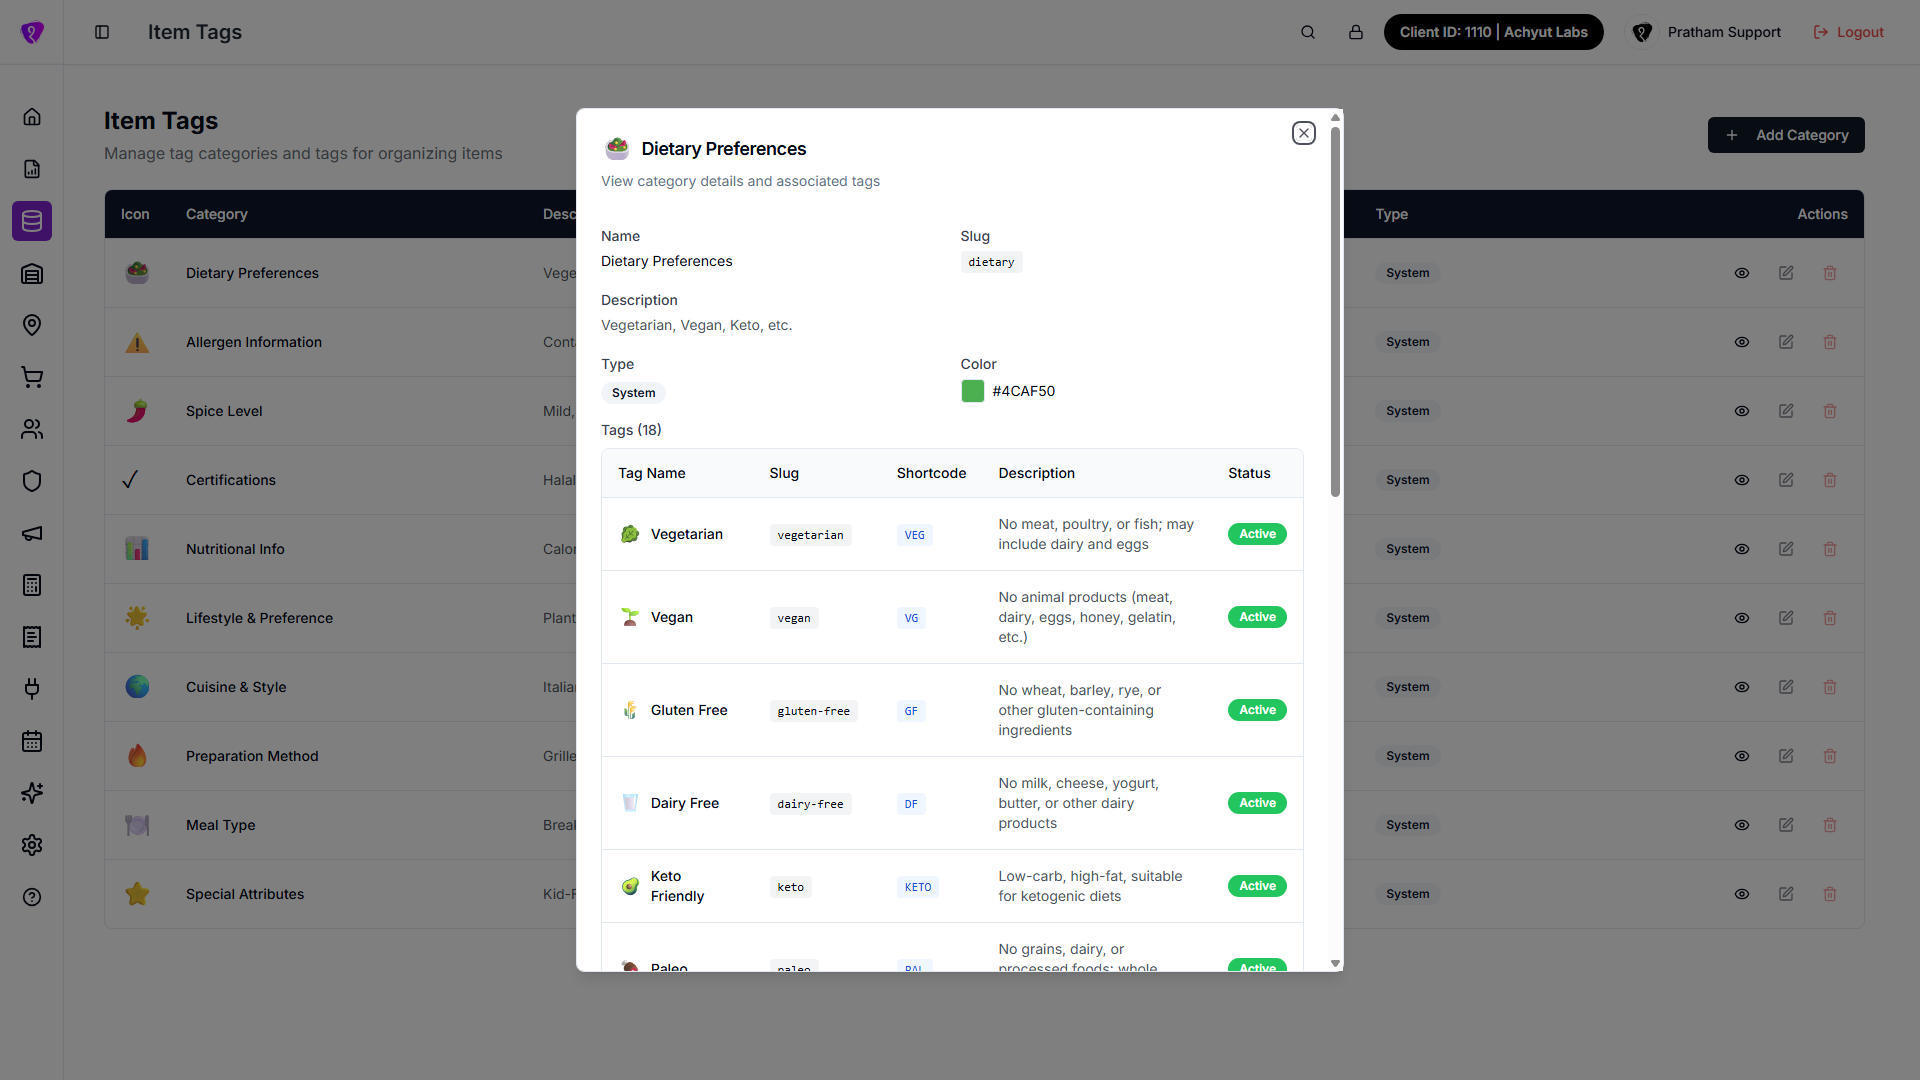 Caption: Read-only category details with associated tags list
How to delete an item tag category
- Click Delete (trash icon) if shown.
- Confirm in the dialog — the text warns that the action cannot be undone.
- If you cancel, nothing is removed.
Tags inside a category (short summary)
- Add rows for new tags with name, description, icon, colour.
- Edit existing tags in place when the form allows it.
- Remove a tag from the list where the UI offers remove — follow any confirmation.
Exact labels and extra validations always match what you see in the live window.
Attach tags to items
After creating categories/tags, attach them from item screens where tag assignment is available.
Attach tags from Location Items
- Open Locations Management -> Location items.
- Click Edit item on the required row.
- In Item Details, use the Tags multi-select to add or remove tags.
- Click Submit to apply changes.
Attach tags from Item form (Product Tags section)
- Open item create/edit form where Product Tags section is available.
- Expand the Product Tags area.
- Select tags under their categories.
- If a selected tag asks for a value, enter and save that value in the same section.
- Save/update the item.
Tip: if no categories appear in Product Tags, create categories and tags first on this page.
Permissions
- Add category — create permission on item tags.
- View — read permission.
- Edit — update permission.
- Delete — delete permission (if your organisation exposes delete).
If a button is missing, your role does not include that action.