Categories — create, edit, view (step by step)
Menu: Master Data Management → Categories
How to create a new category
- Click Add Category (top right; only if your role may add categories).
- A side panel opens with the title Add Category.
- Fill the fields (see Required and Optional below).
- Click Create Category at the bottom.
- Wait for success; the panel closes and the new row appears in the table.
If save fails: read the red toast (for example permission or server error).
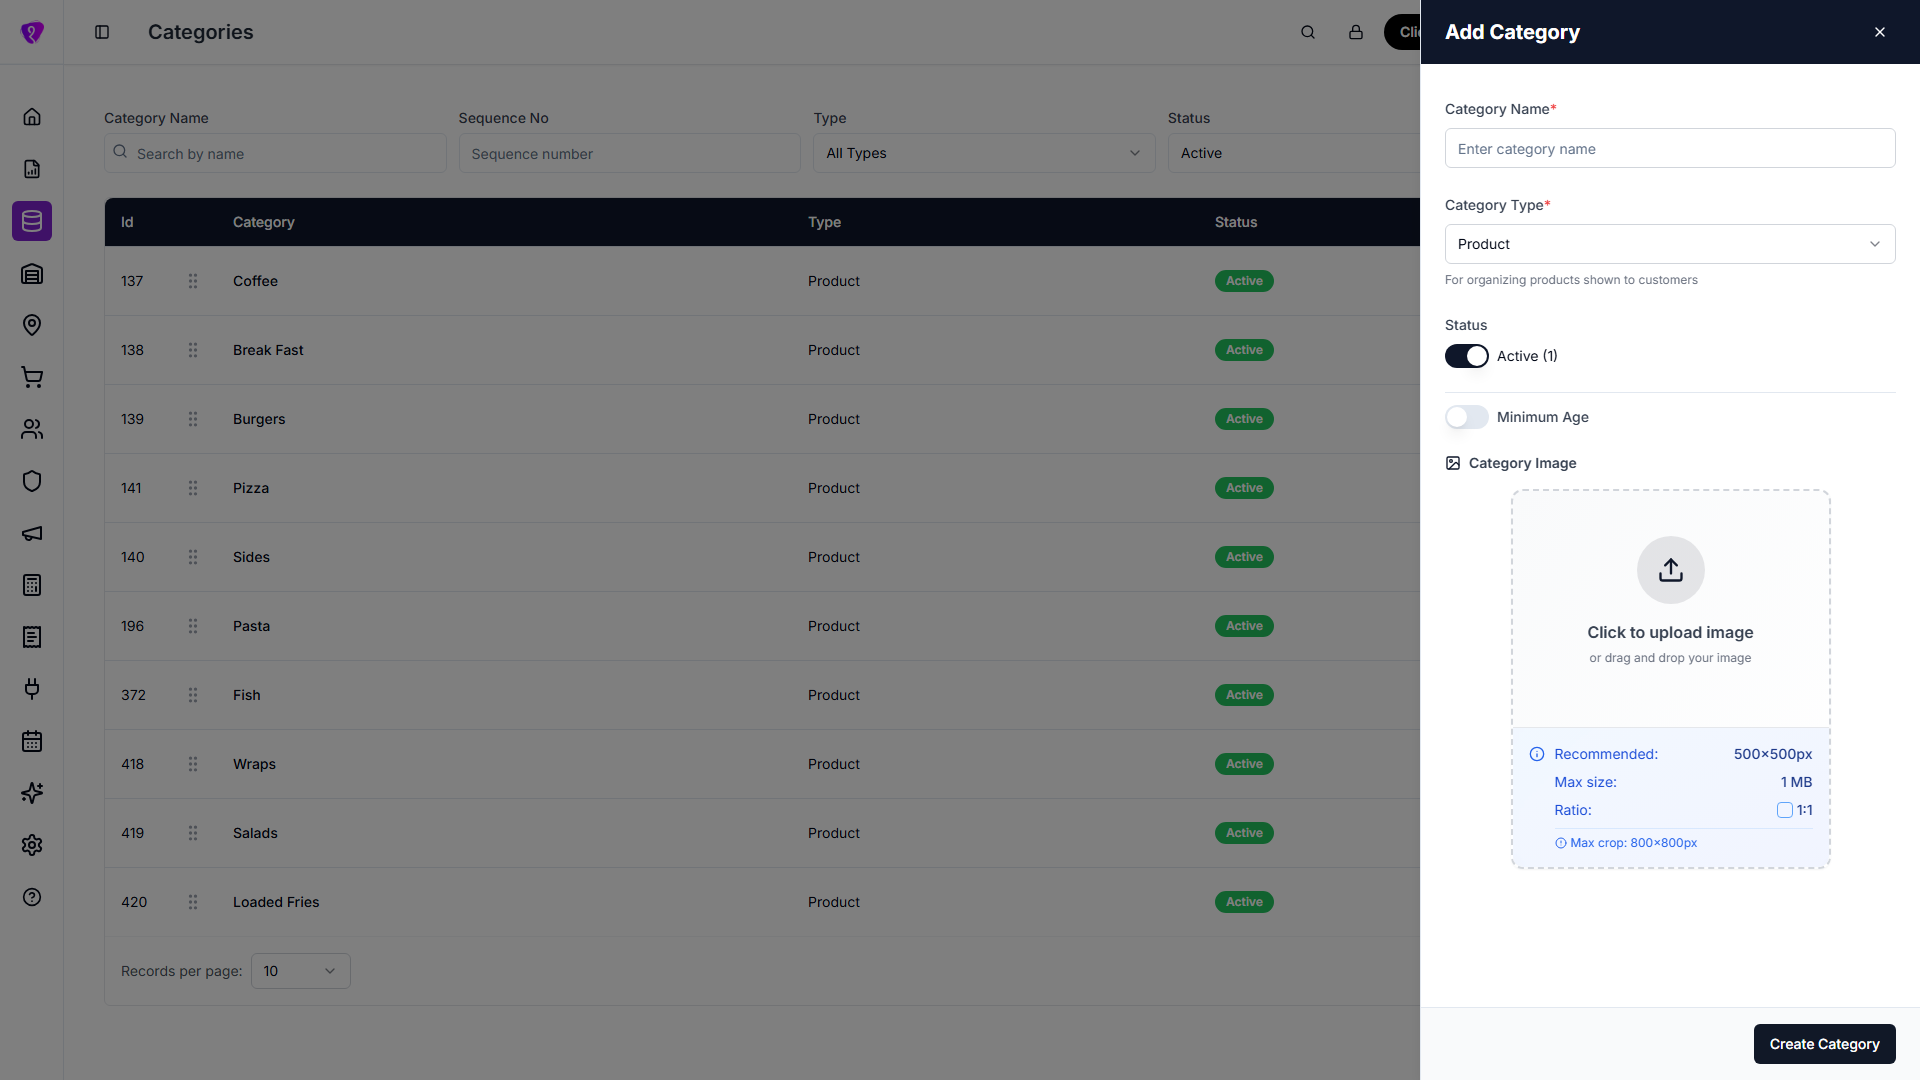 Caption: Add Category panel with create fields
How to edit a category
- In the table, find the row and click the pencil (Edit) icon.
(Only if your role may change categories.) - The panel title shows Edit Category; ID is shown read-only.
- Change Category Name, Category Type, Status, Minimum Age, or image as needed.
- Click Update Category.
Image: use Change Image or Delete (confirm dialog) as needed. While the image uploads you may see Updating Image….
How to view a category (read-only)
- Click the eye (View) icon on the row.
- The panel title shows View Category. Fields are not editable.
- Click Close at the bottom (or X in the header).
What you must fill (required)
| Field | When is it required? |
|---|---|
| Category Name | Always, for create and edit. Empty → Category name is required. |
| Category Type | Always — choose Product, Ingredient, or Packaging. |
Minimum Age
- If the Minimum Age switch is OFF → you do not need a number.
- If the switch is ON → you must enter an age 0–150.
Errors: Please enter a minimum age when minimum age is enabled. · Minimum age must be a number between 0 and 150.
Category image
- Not required — you can save without an image.
- If you add one: must be an image file and under 1 MB after rules on screen.
What you can fill (optional)
| Field | Notes |
|---|---|
| Status | Active (1) or Inactive (0) — default is usually Active when adding. |
| Category Image | Recommended 500×500 px, 1:1; crop dialog after file pick. |
| Minimum Age | Only when selling age-restricted groups; leave switch off if not needed. |
Other actions on this screen
| Action | How |
|---|---|
| Search / filter | Category Name, Sequence No, Type, Status — optional; narrows the list. |
| Reorder | Drag the grip handle on a row; order saves to the server. |
| Import CSV | Upload icon — opens import (only if your role may add categories). CSV reference: Import CSV format (Categories); blank template: download CSV. |
| Refresh | Circular arrows — reload list. |
Import CSV format (Categories)
Download a blank template: Categories import template (CSV) — first row is the header; add one row per category.
The Categories Import dialog accepts a CSV with a header row. Column names are read as below (you can use either name where two are listed).
| Column | Accepted header names | Notes |
|---|---|---|
| Category name | category, name, or category_name | If missing, a placeholder name like Category 1 is used. |
| Status | status | Active, 1, or numeric 1 -> active; anything else -> inactive. |
| Image / attachment | attachment | Optional (URL or path as your process expects). |
| Sequence number | seq_no or sequence | Integer; defaults to row order (1, 2, 3...). |
module_type is set internally by the app during import, so you do not need a column for it.
Use UTF-8 encoding if names include special characters. After upload, server-side validation errors are shown in the import result toast.